
Support: VSS App Guide
Welcome to the Howen VSS App! This guide will help you understand and use the app easily. The app allows you to view live tracking, review recorded events, and manage your fleet efficiently. Follow the steps below to get started.
Install and Log In
- Search for 'Howen VSS' on the Apple App Store or Google Play Store and install the app.
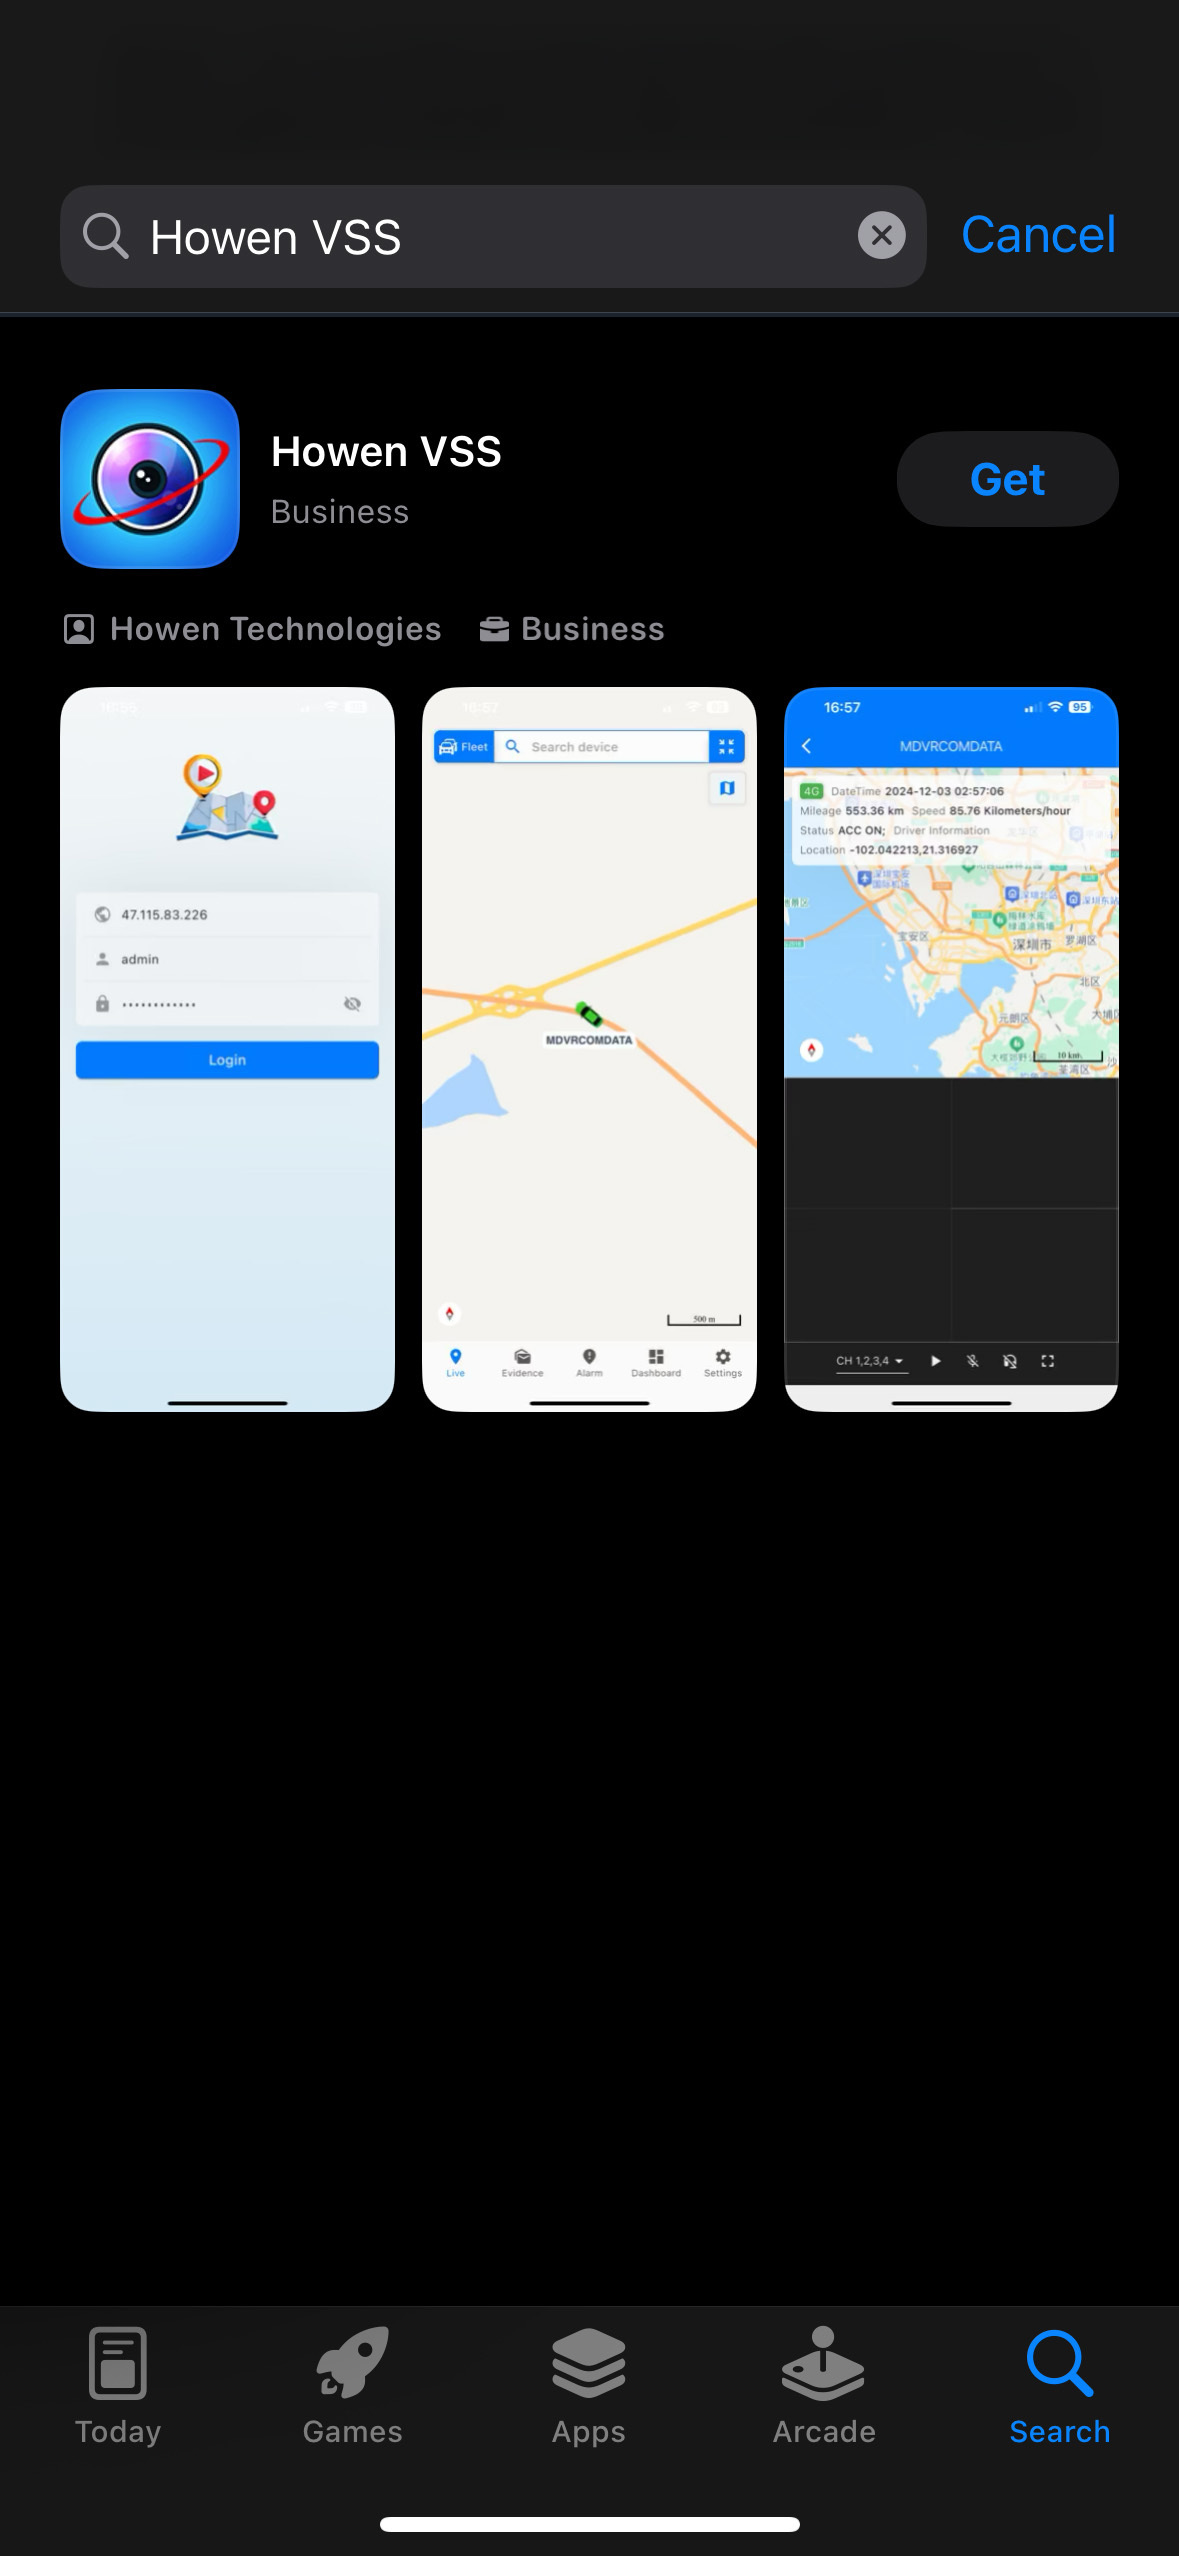
- Once installed, open the app. It will automatically use your phone’s language if supported (default is English).
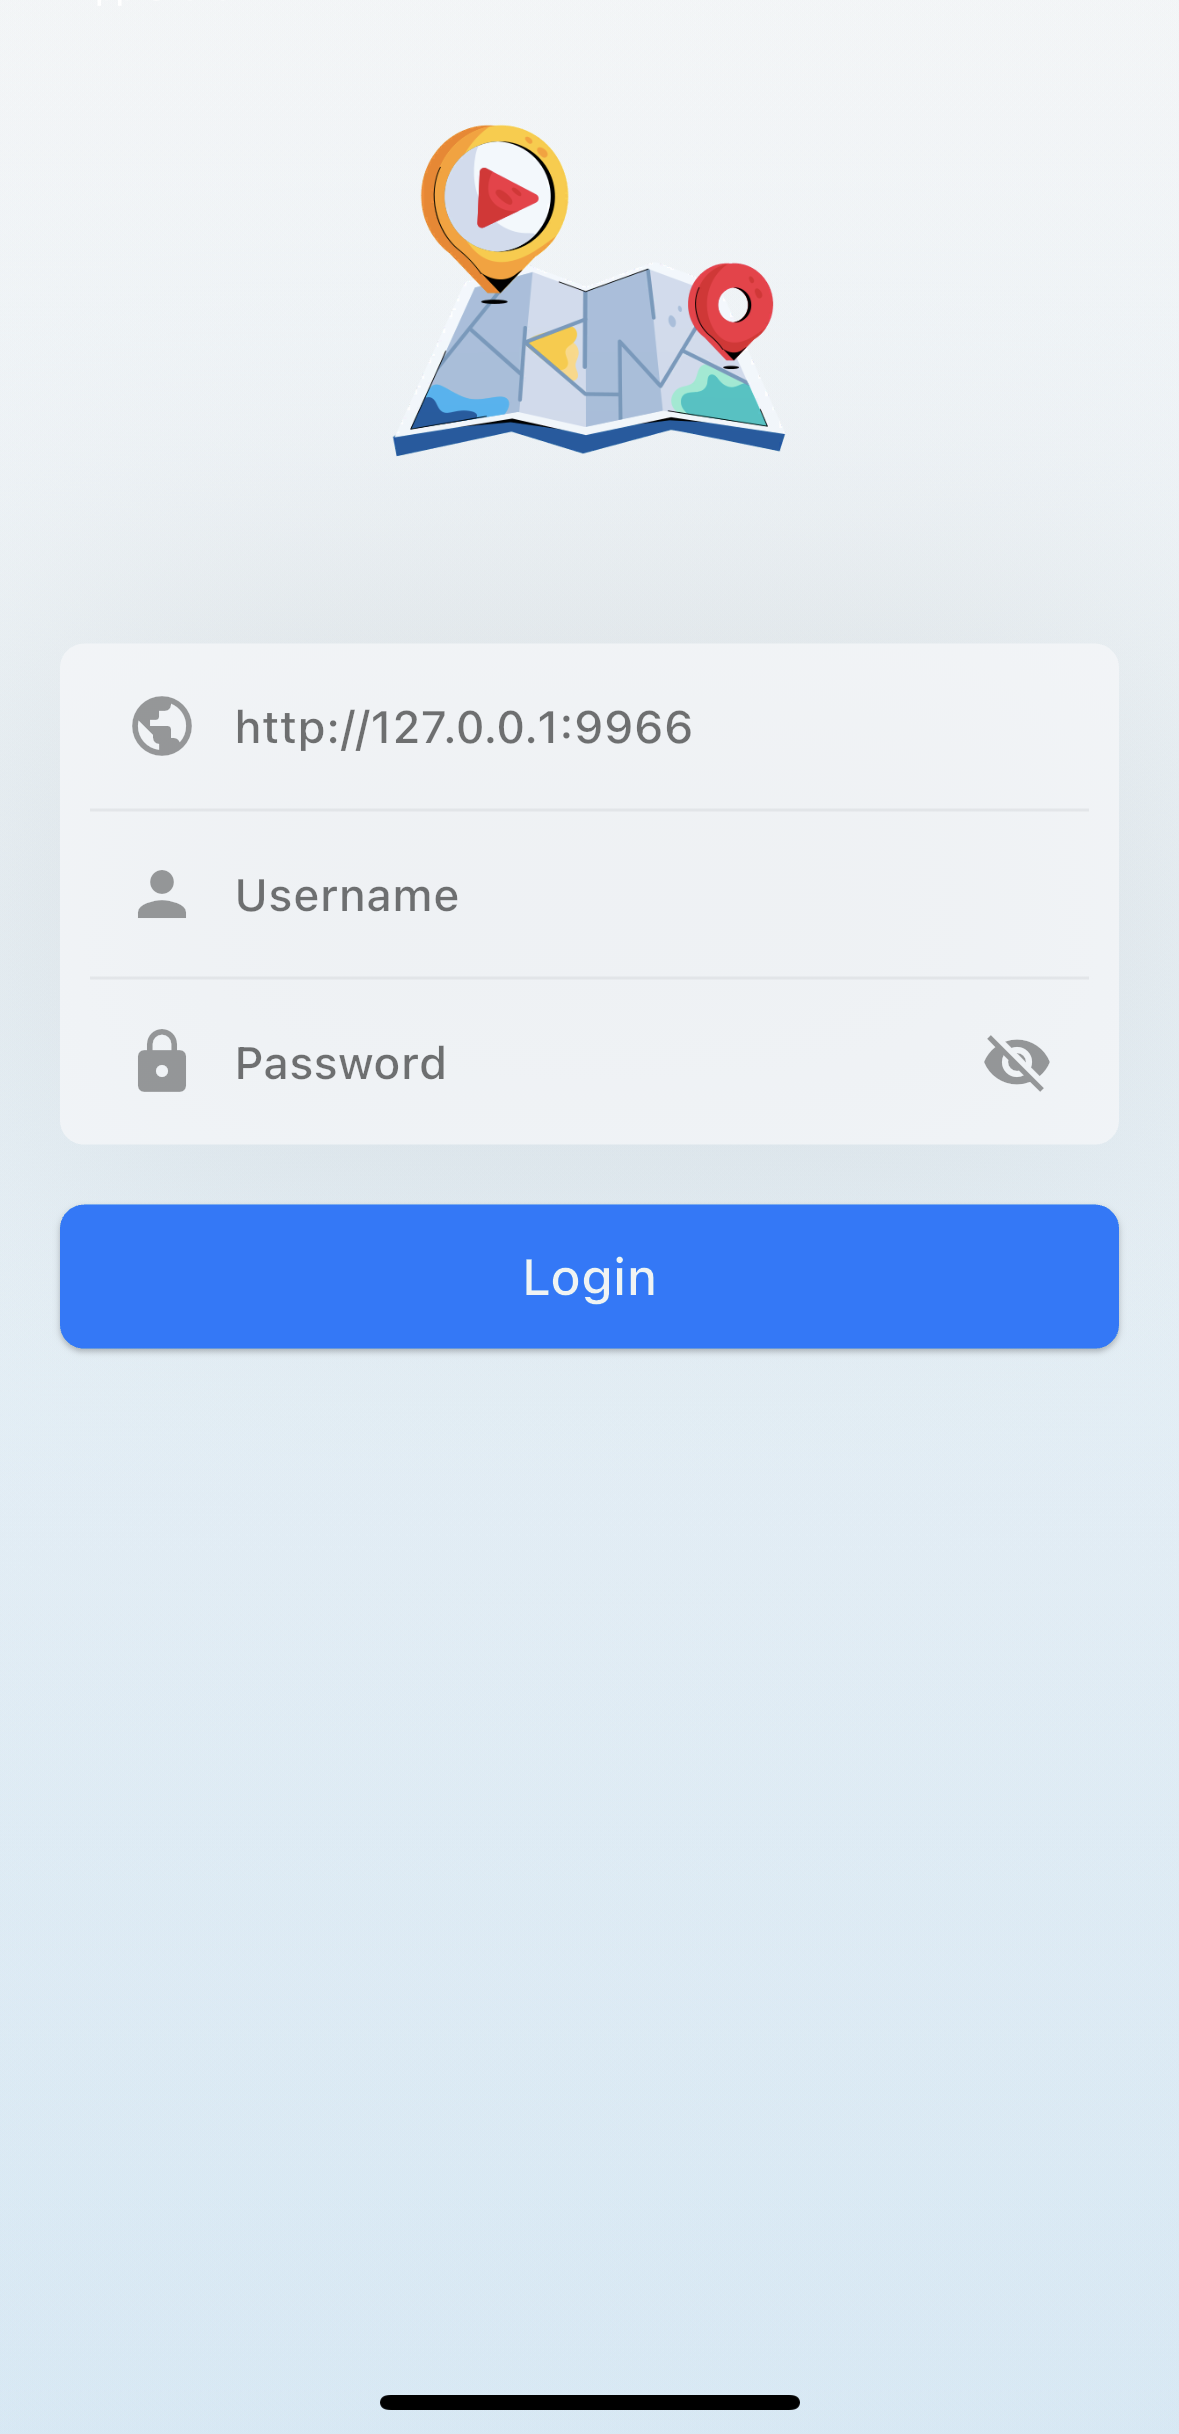
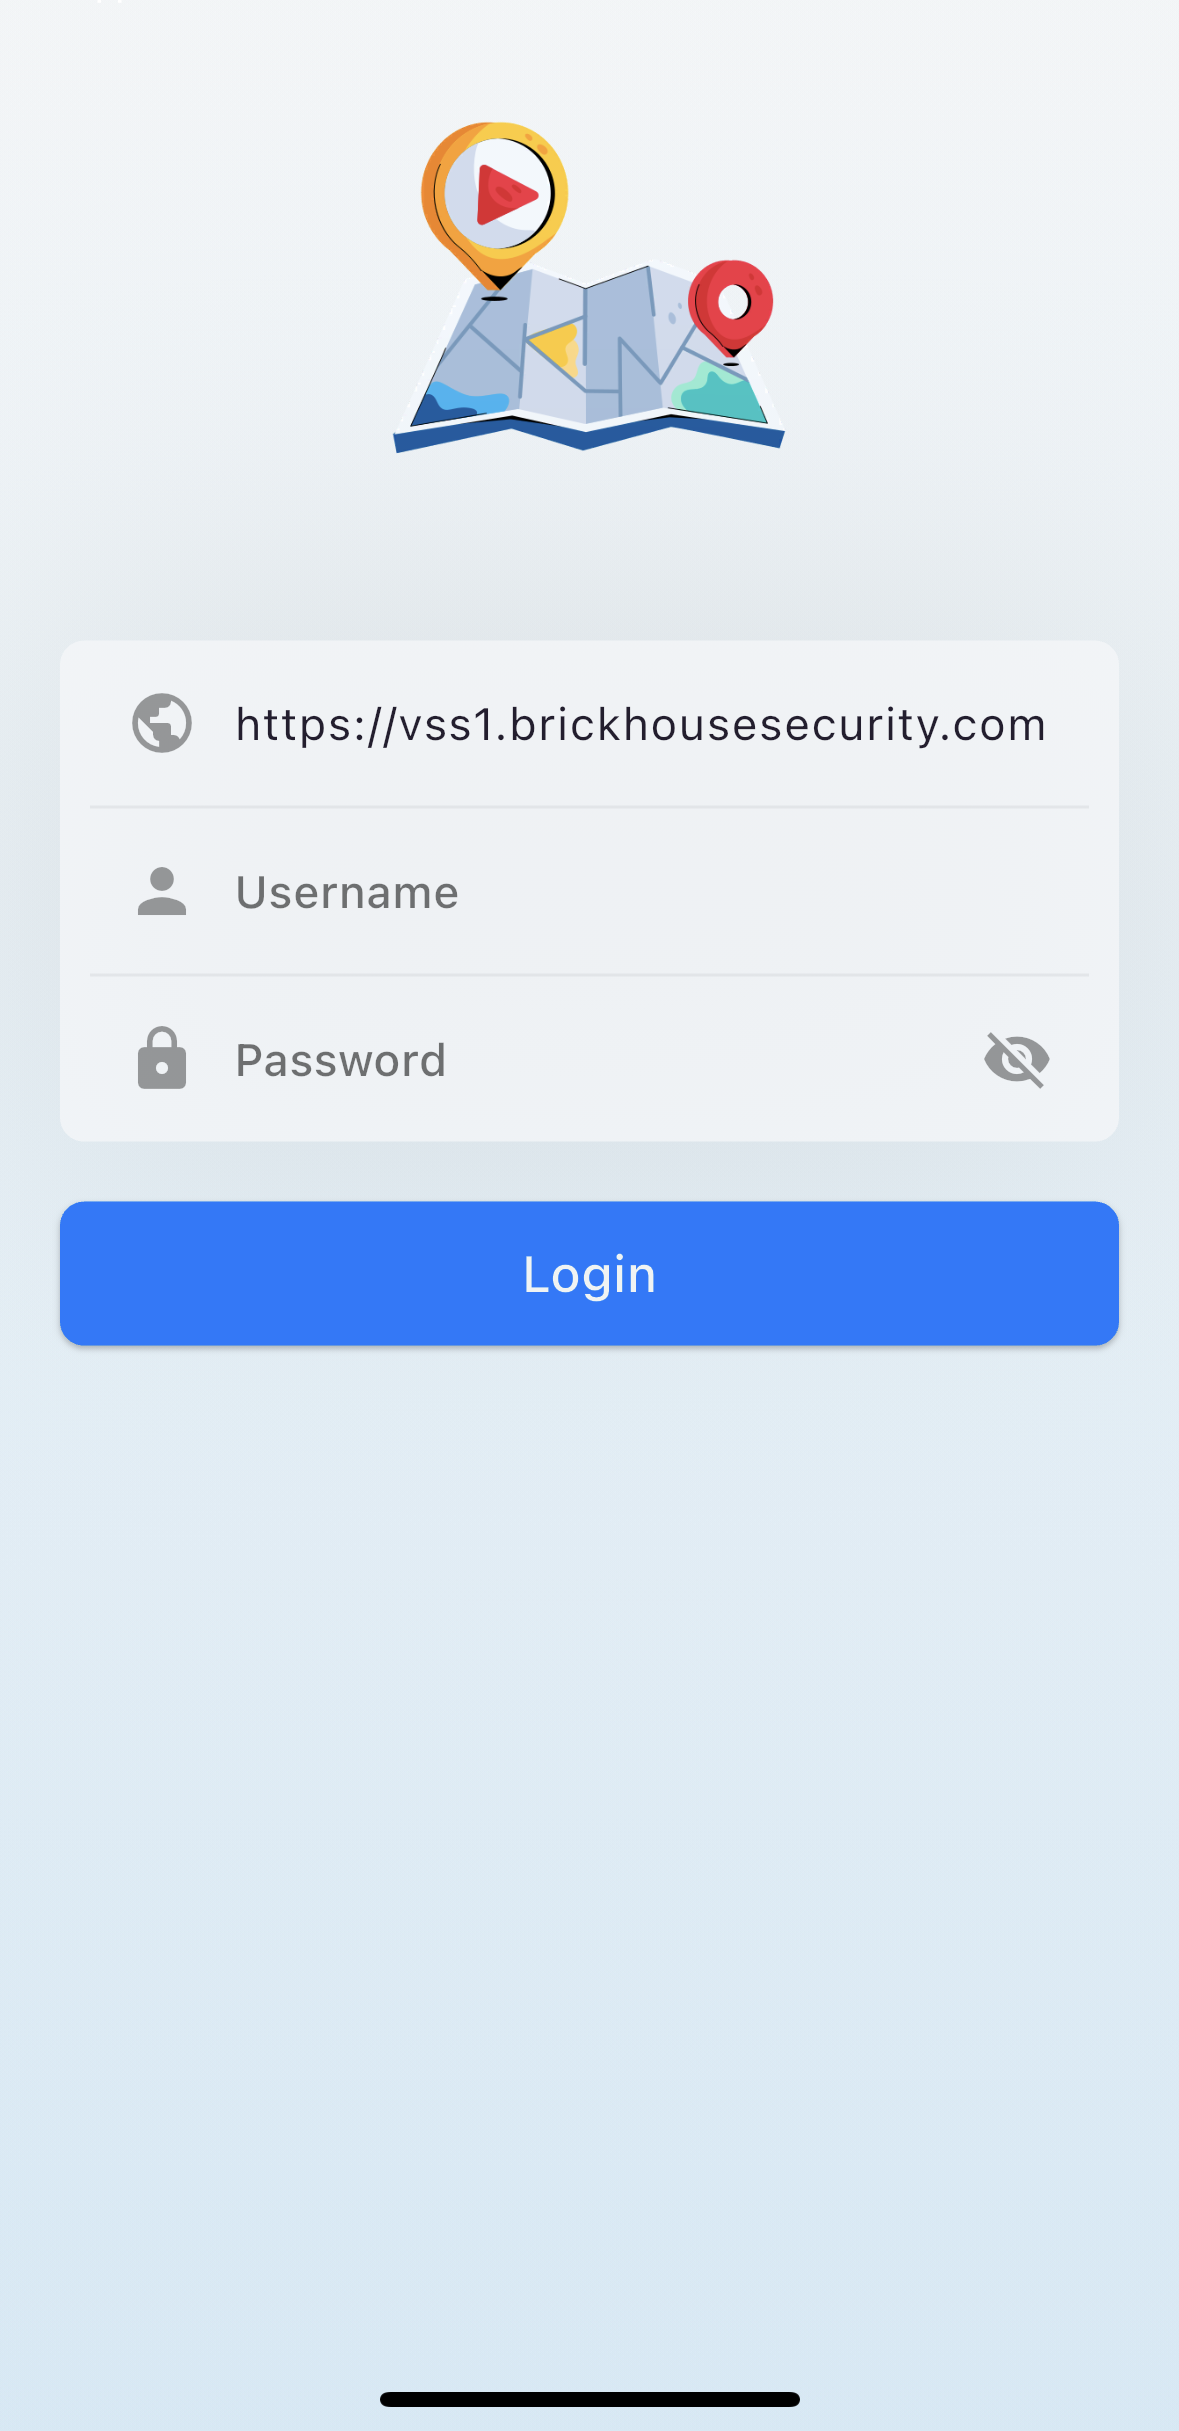
- Enter your VSS server IP address: https://vss1.brickhousesecurity.com
- Enter your username and password, then tap 'Login' to access your account.
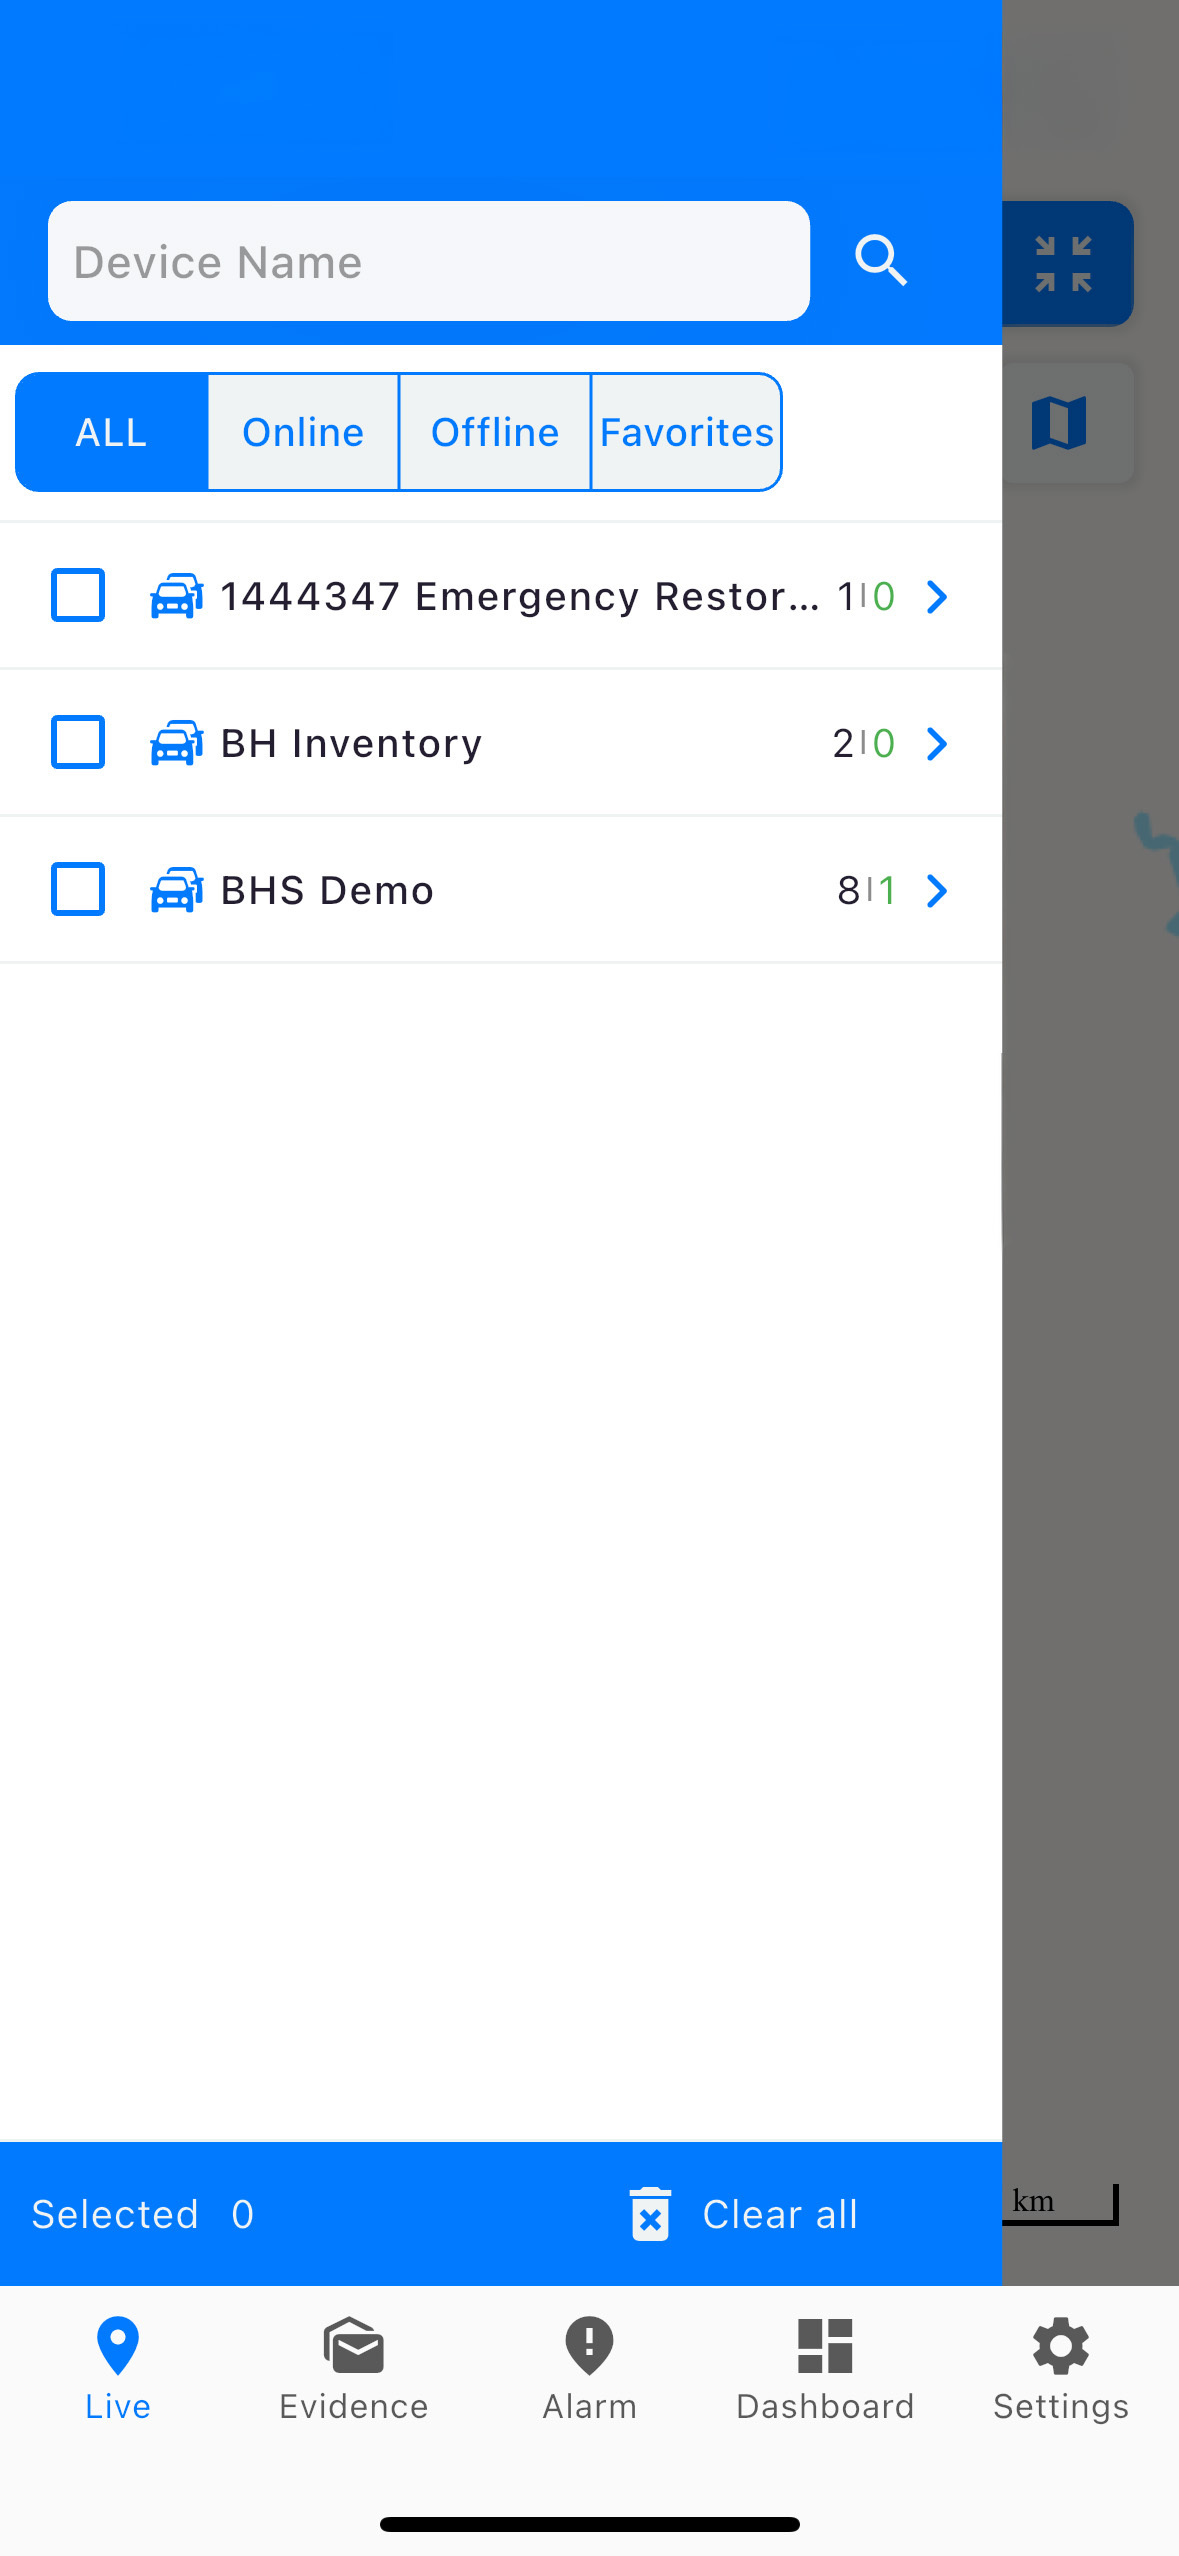
After logging in, the app automatically opens to the Live tab, where you can instantly view your active devices and see their real-time locations on the map.
Live Tab
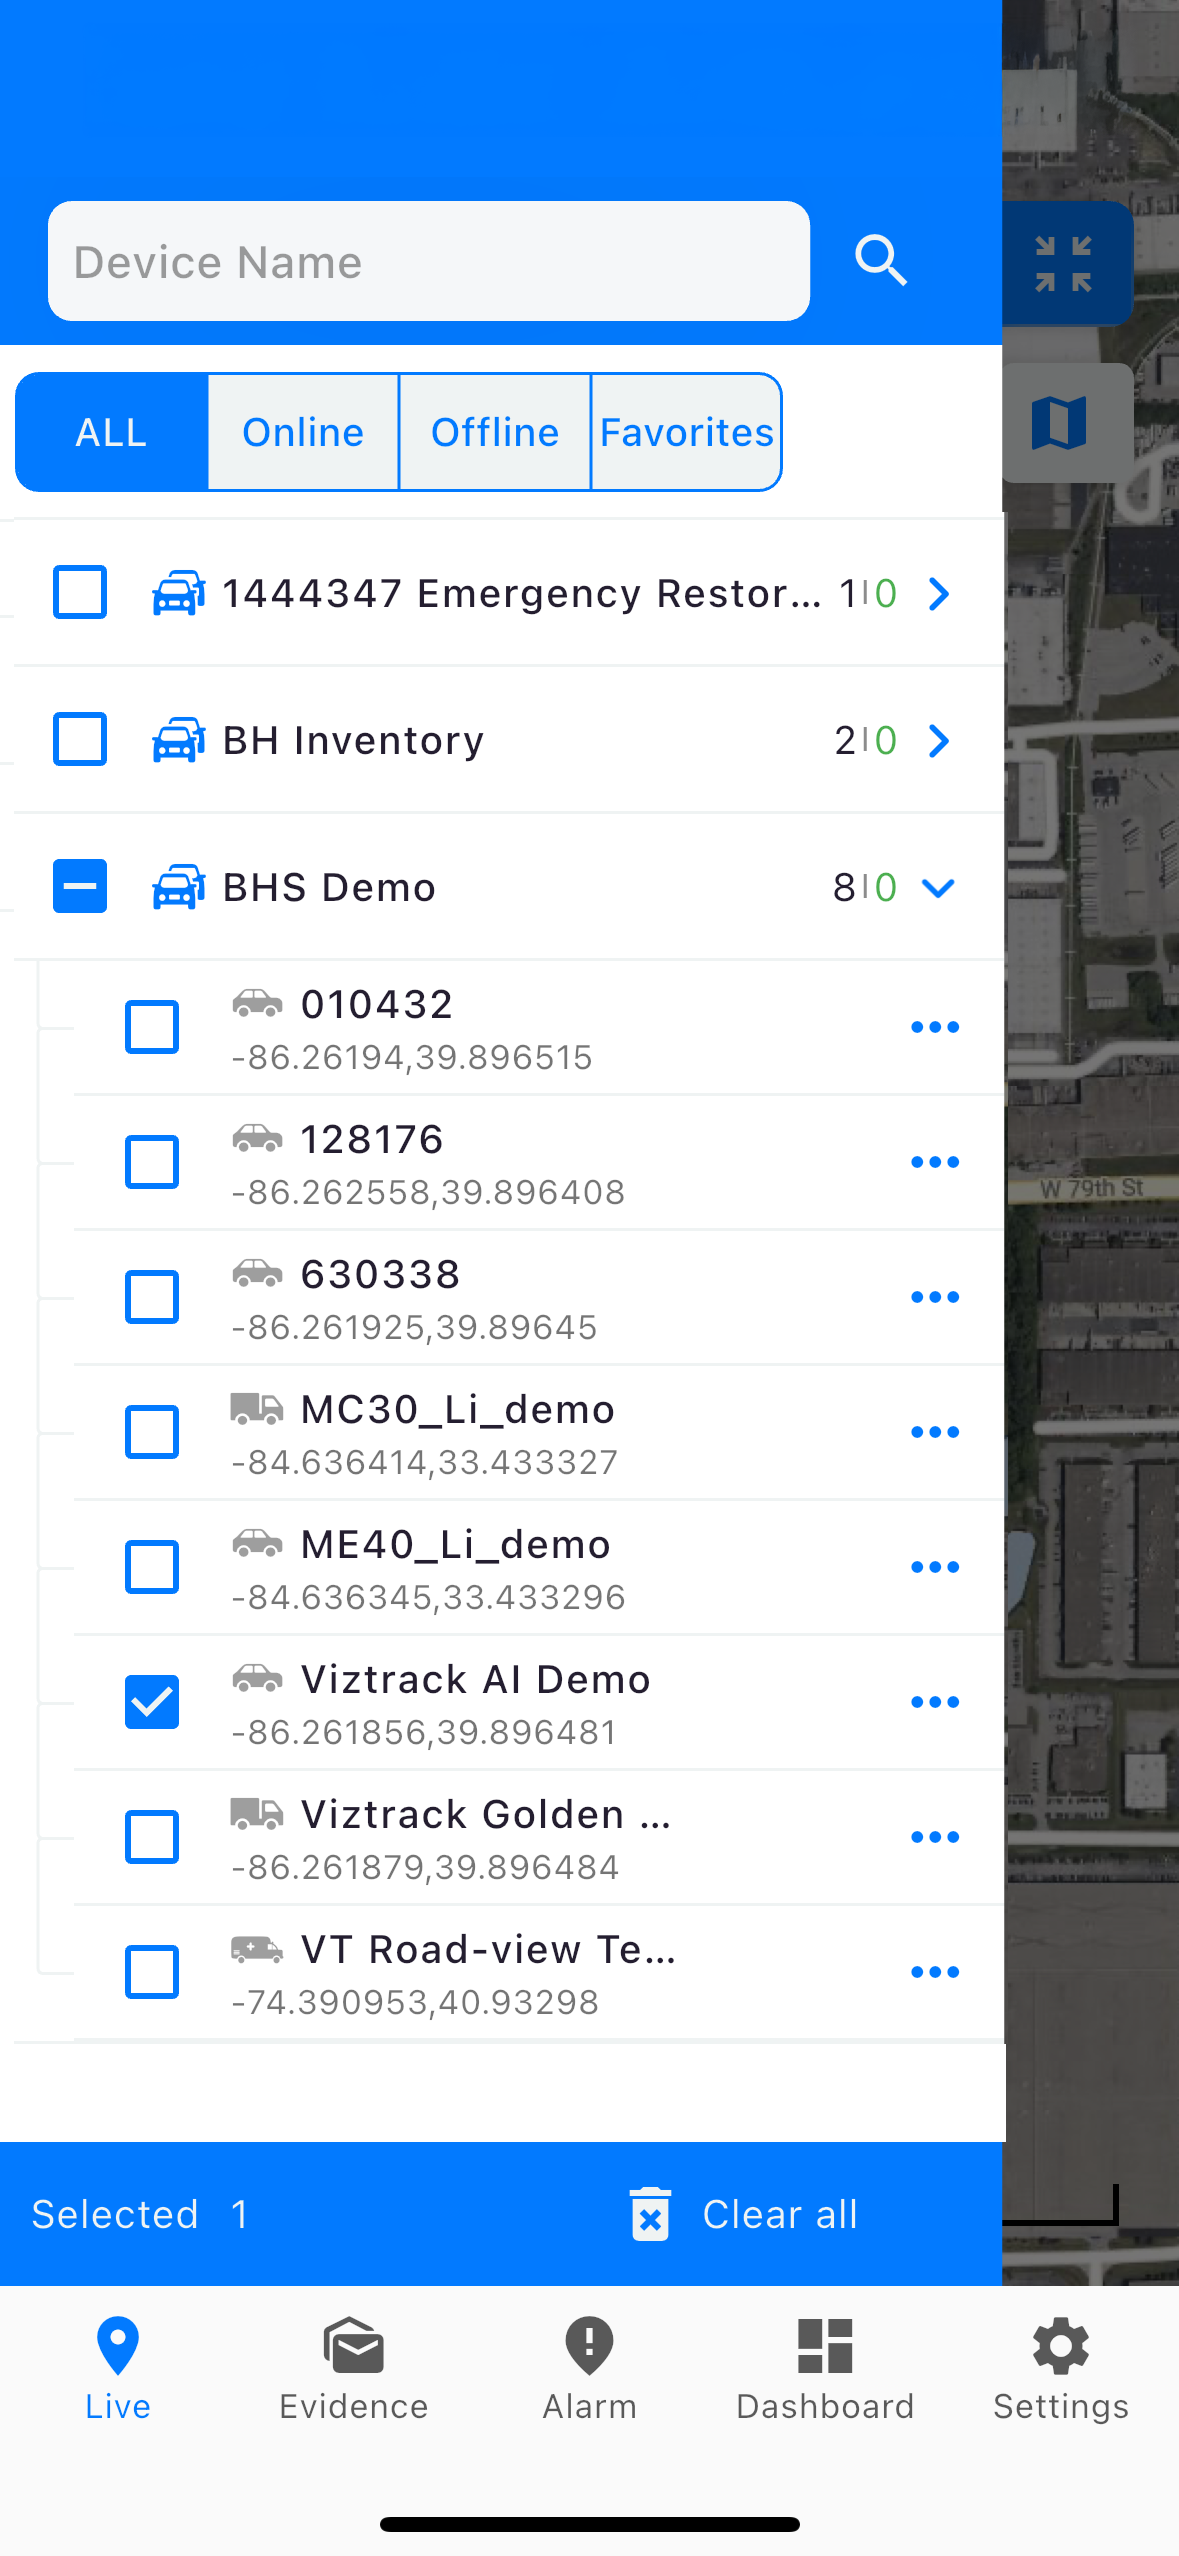
View real-time locations of your tracked devices or vehicles. This tab shows current positions, movement status, and online/offline indicators.
Navigation Icons Description
ALL
Displays every device in your account, regardless of online or offline status.
Online
Shows only devices that are currently active and transmitting location data.
Offline
Lists devices that are not currently reporting or have lost connection.
Favorites
Quickly access devices you’ve marked as favorites for easier tracking.
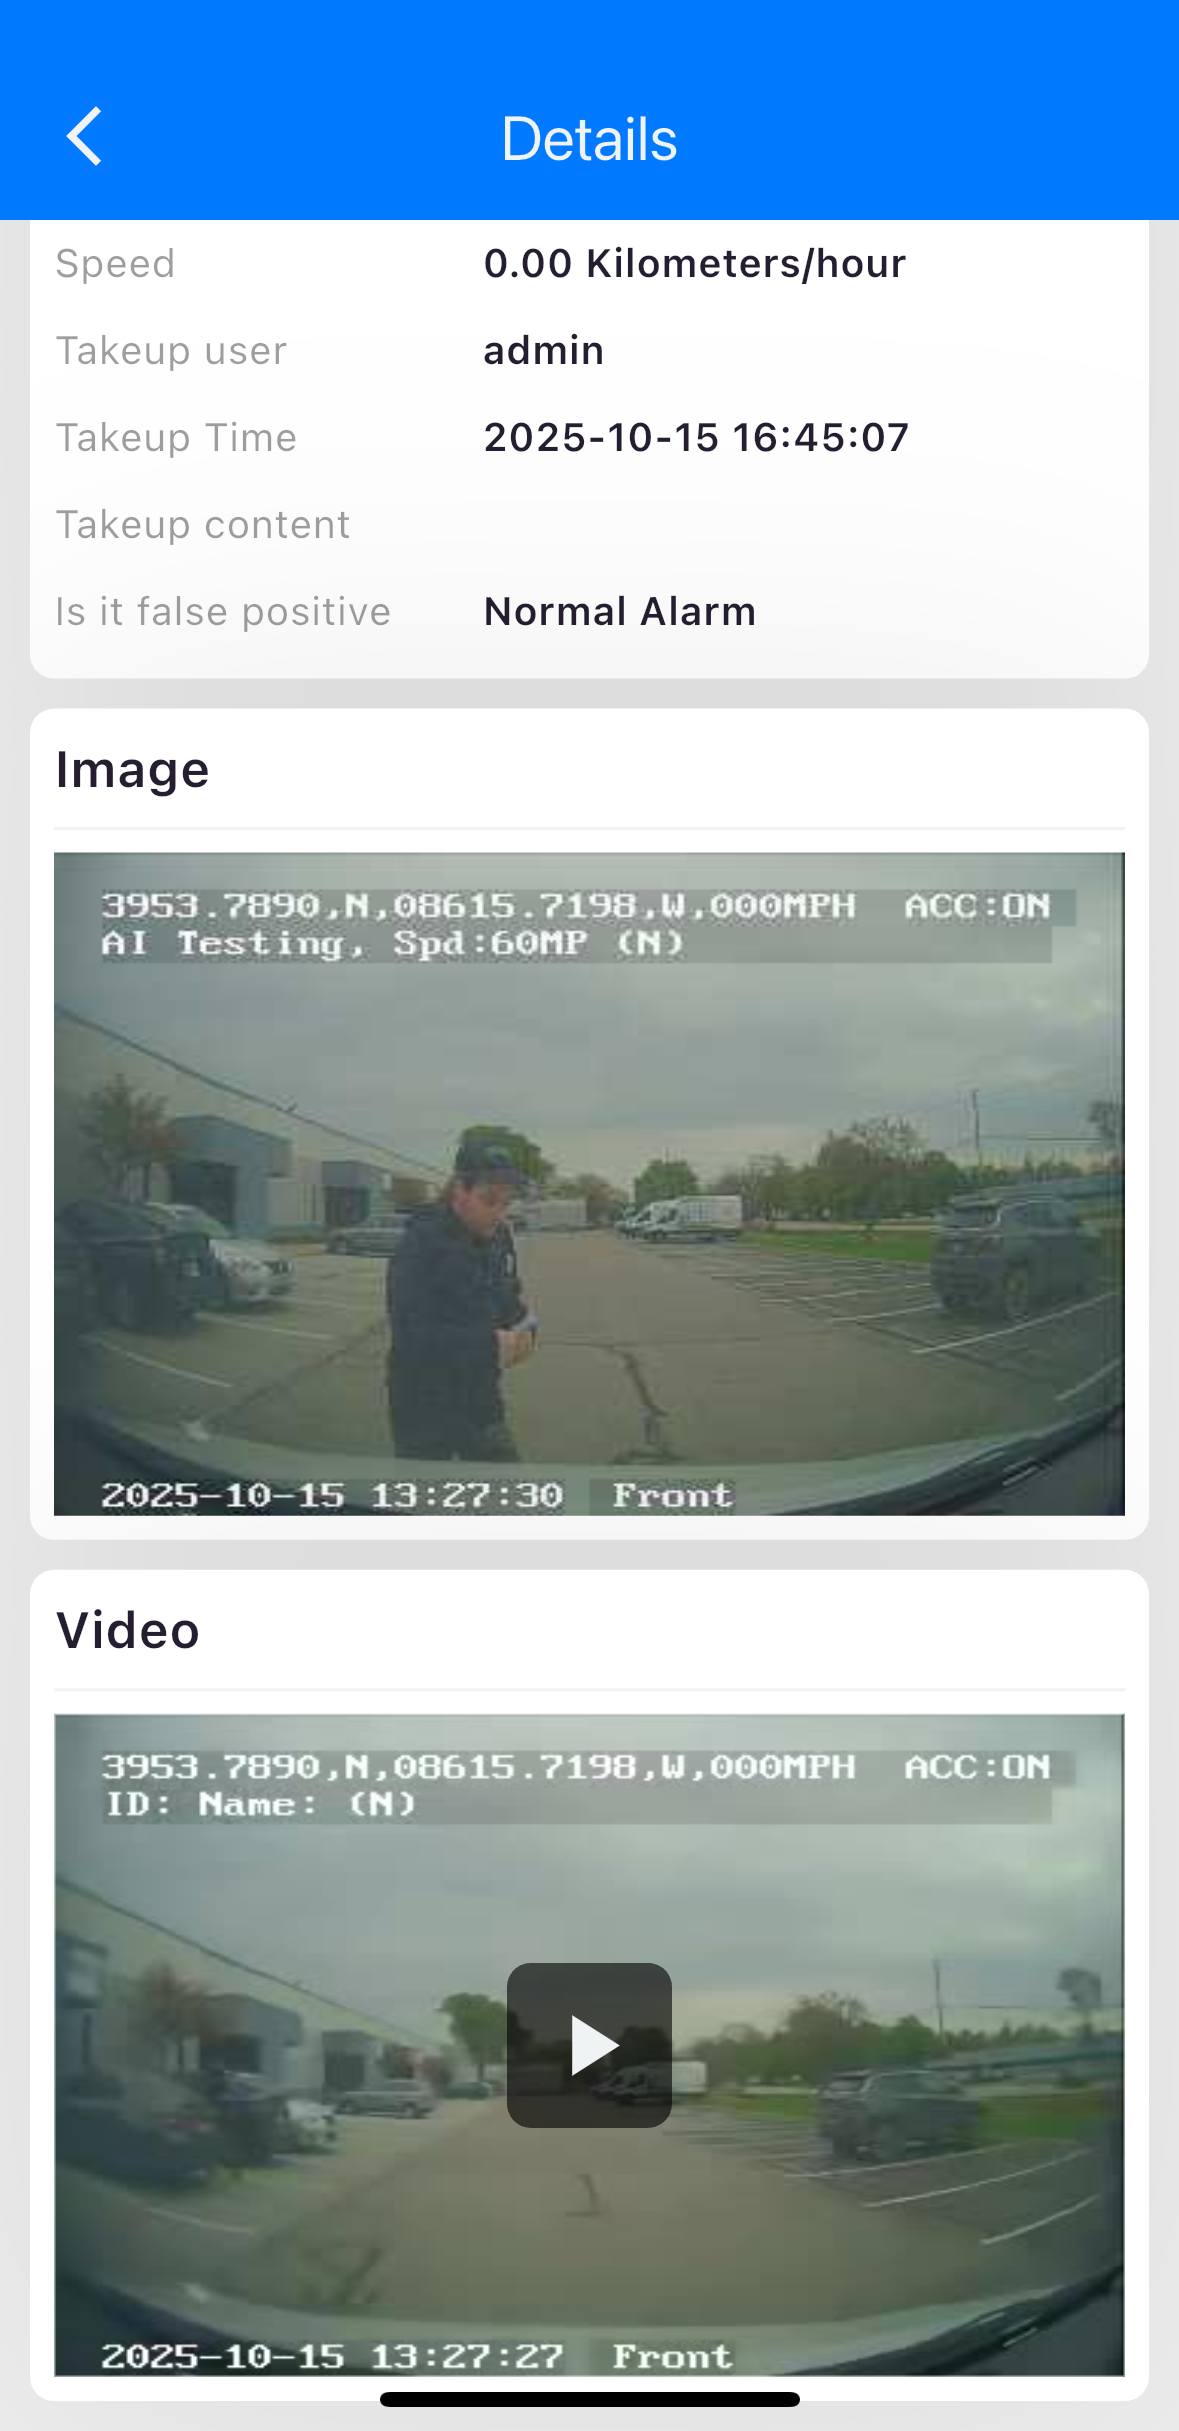
View Evidence
The Evidence section stores alarm-related images and videos uploaded from your devices. You can filter the evidence by time or alarm type to quickly find what you need.
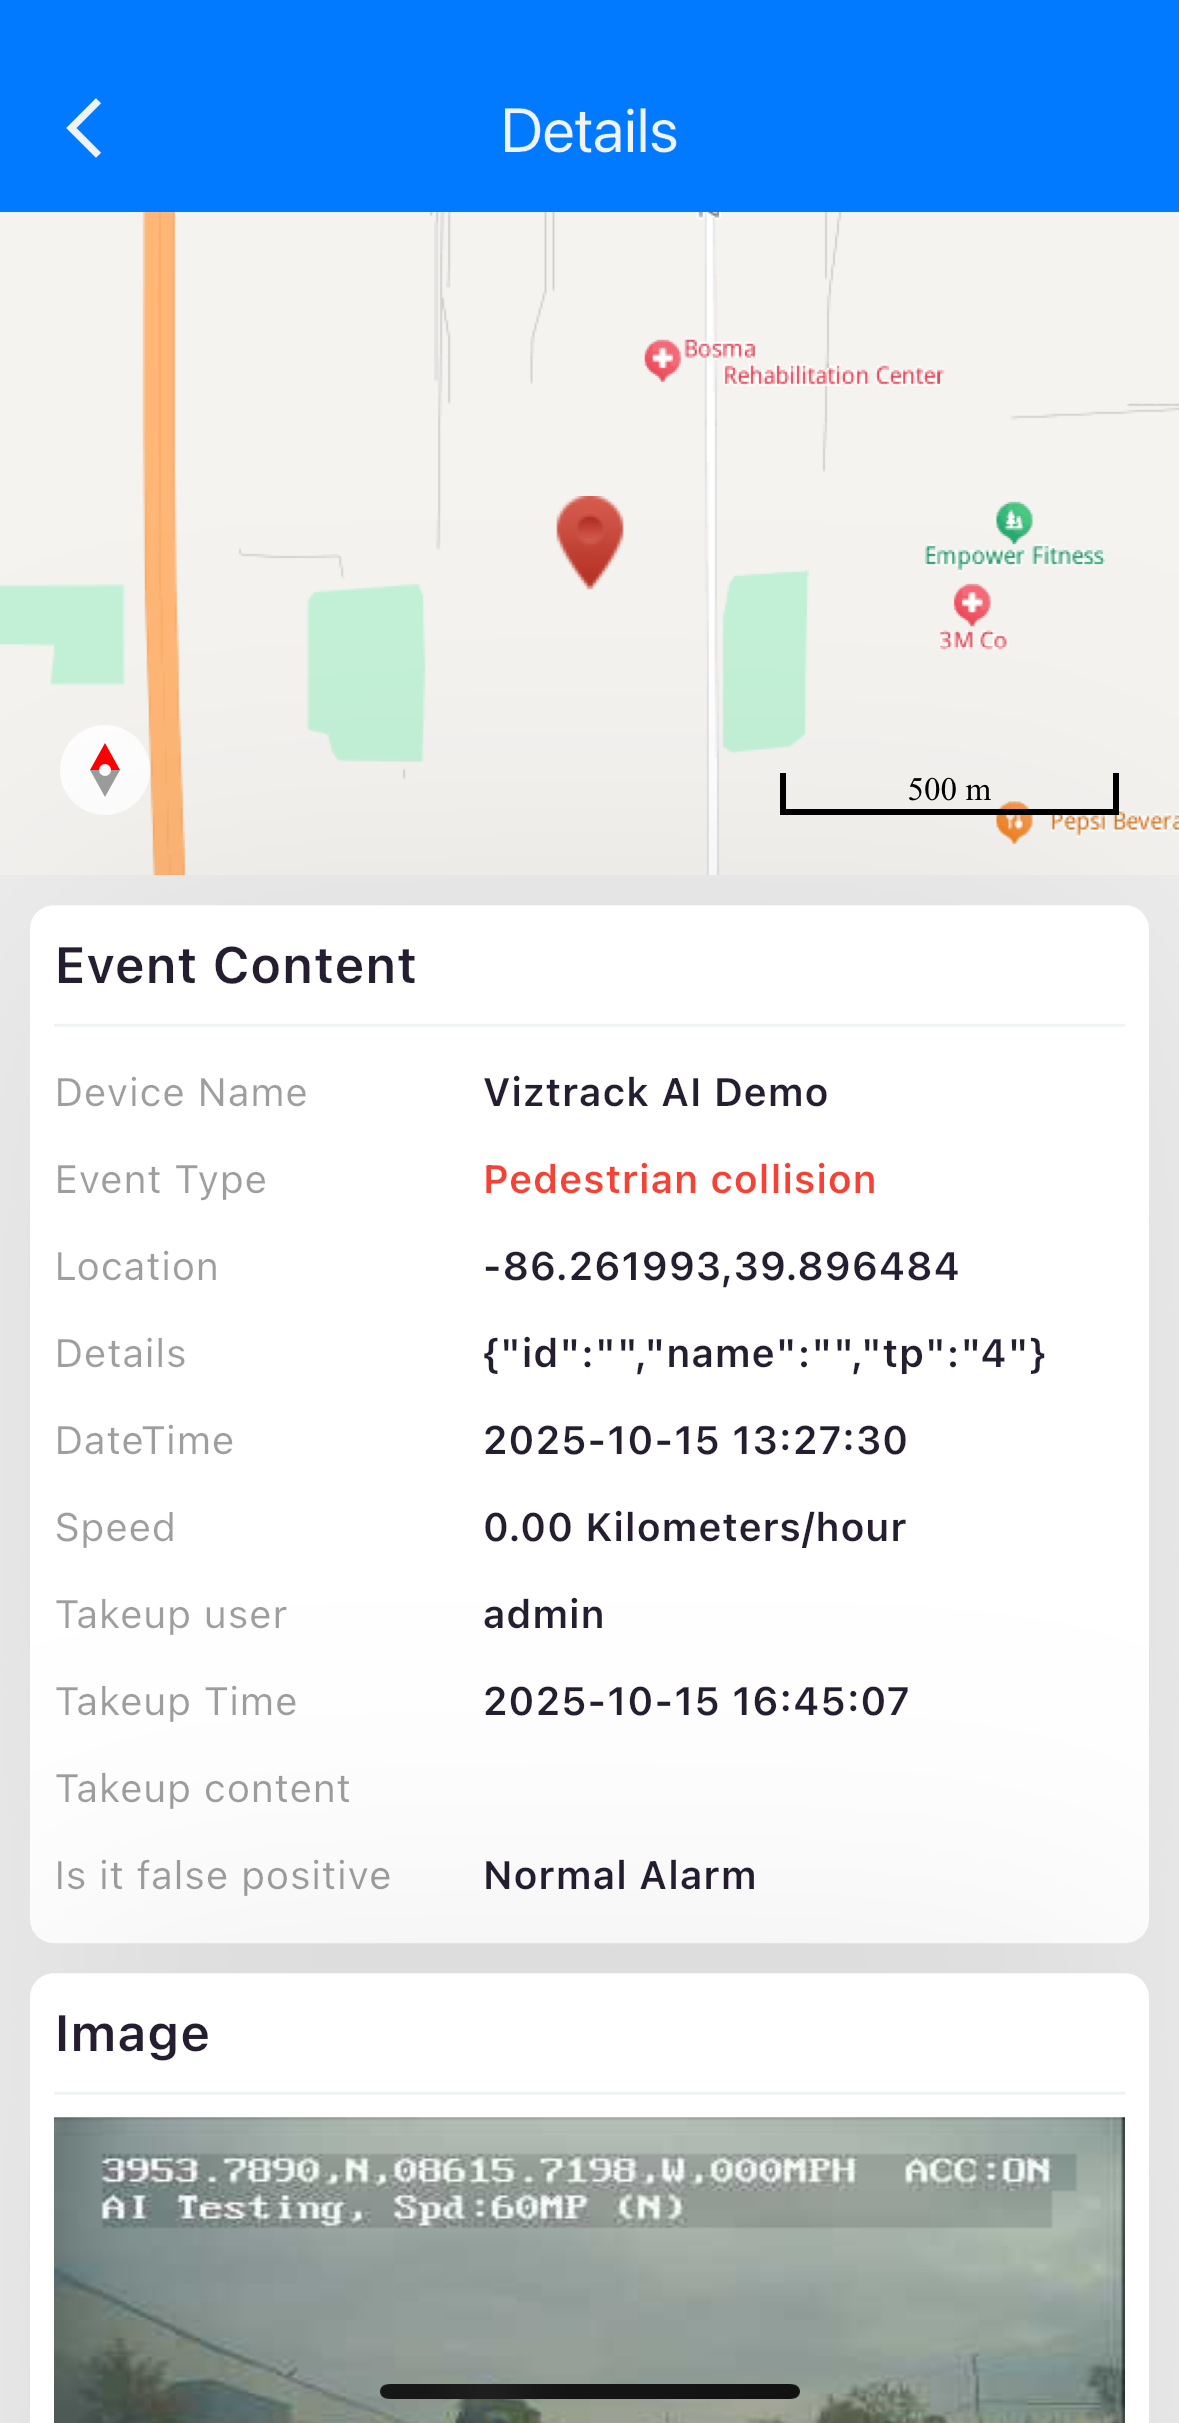
Tap any evidence preview to view details like event type, location, and driver information.

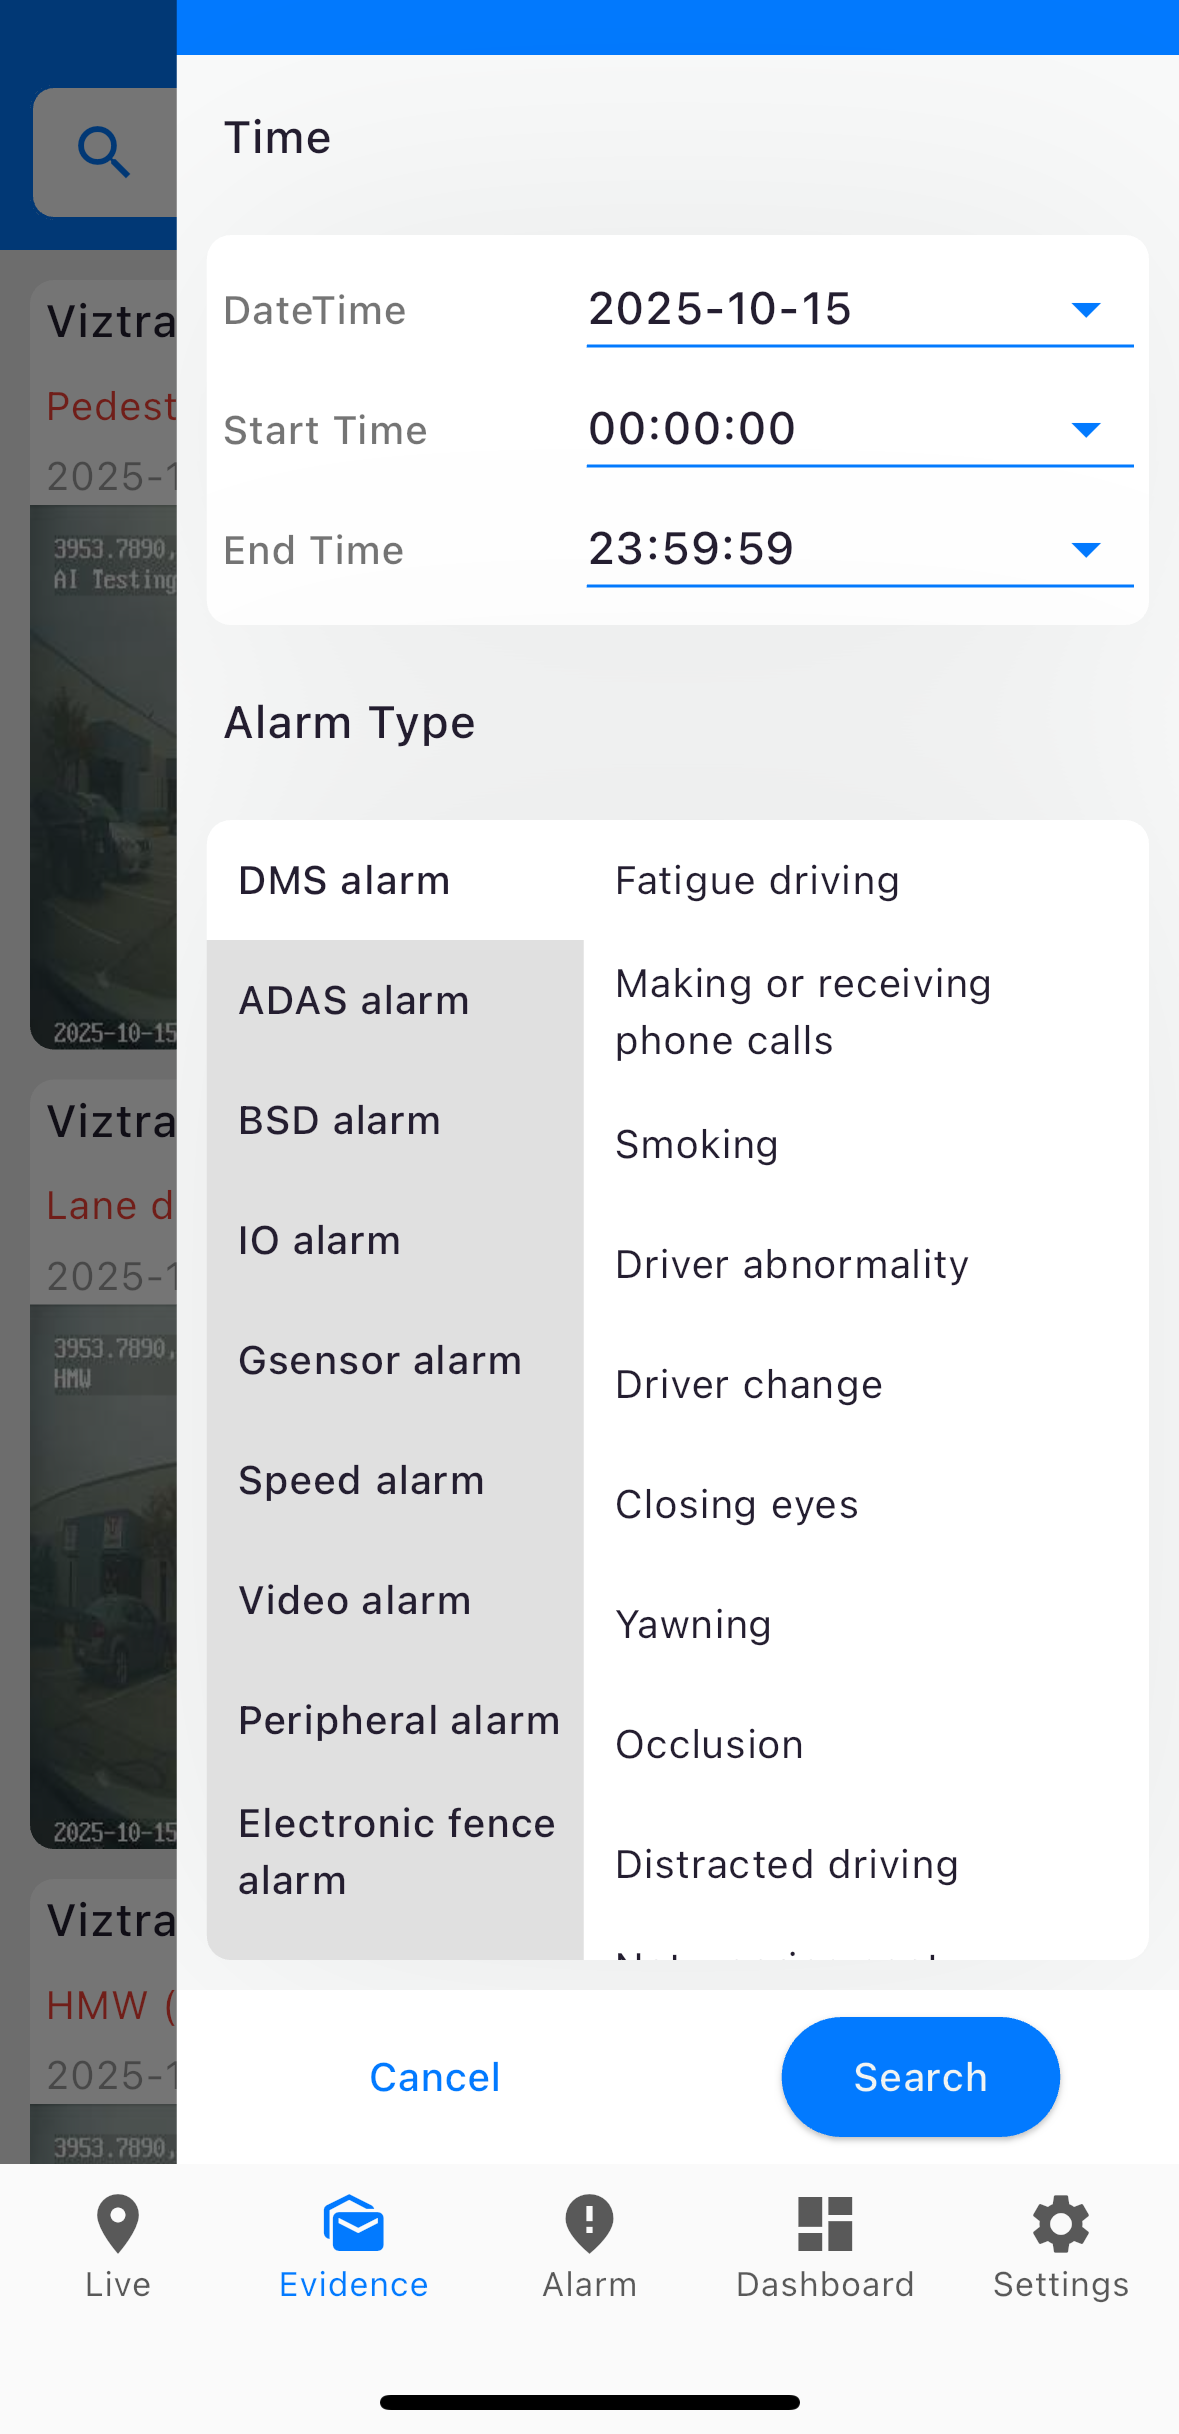
Tap any evidence item to view detailed information, including the event type, location, driver details, and other alarm information.
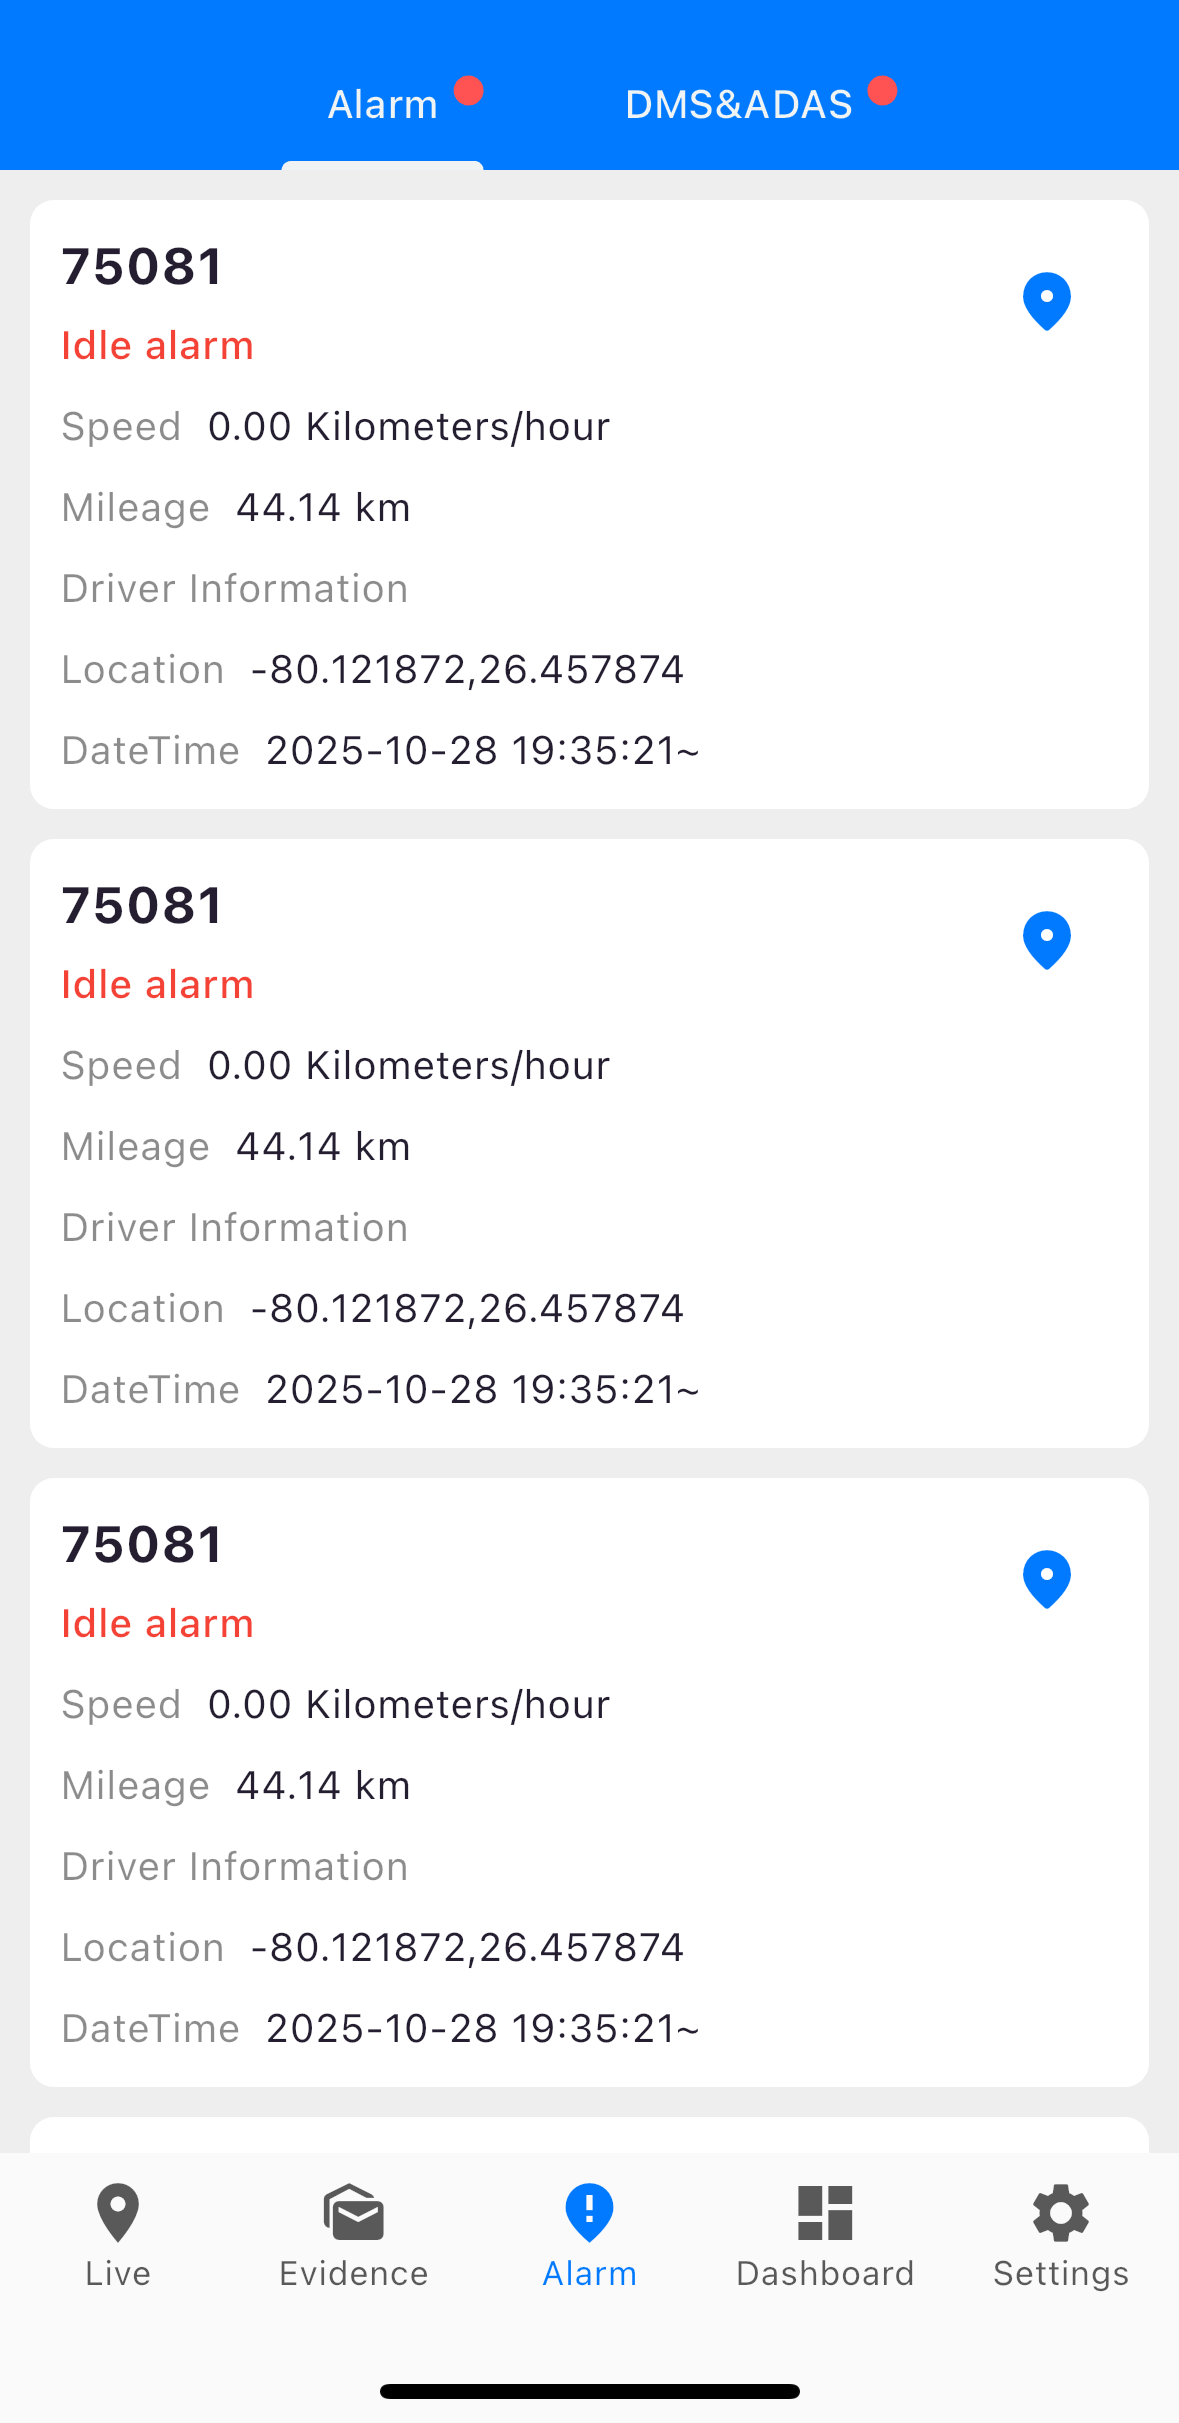
Check Alarms
The Alarm section shows all real-time alarms, including DMS (Driver Monitoring System) and ADAS (Advanced Driver Assistance System) alerts.
You’ll see information such as alarm type, speed, mileage, driver, location, and time of the event.
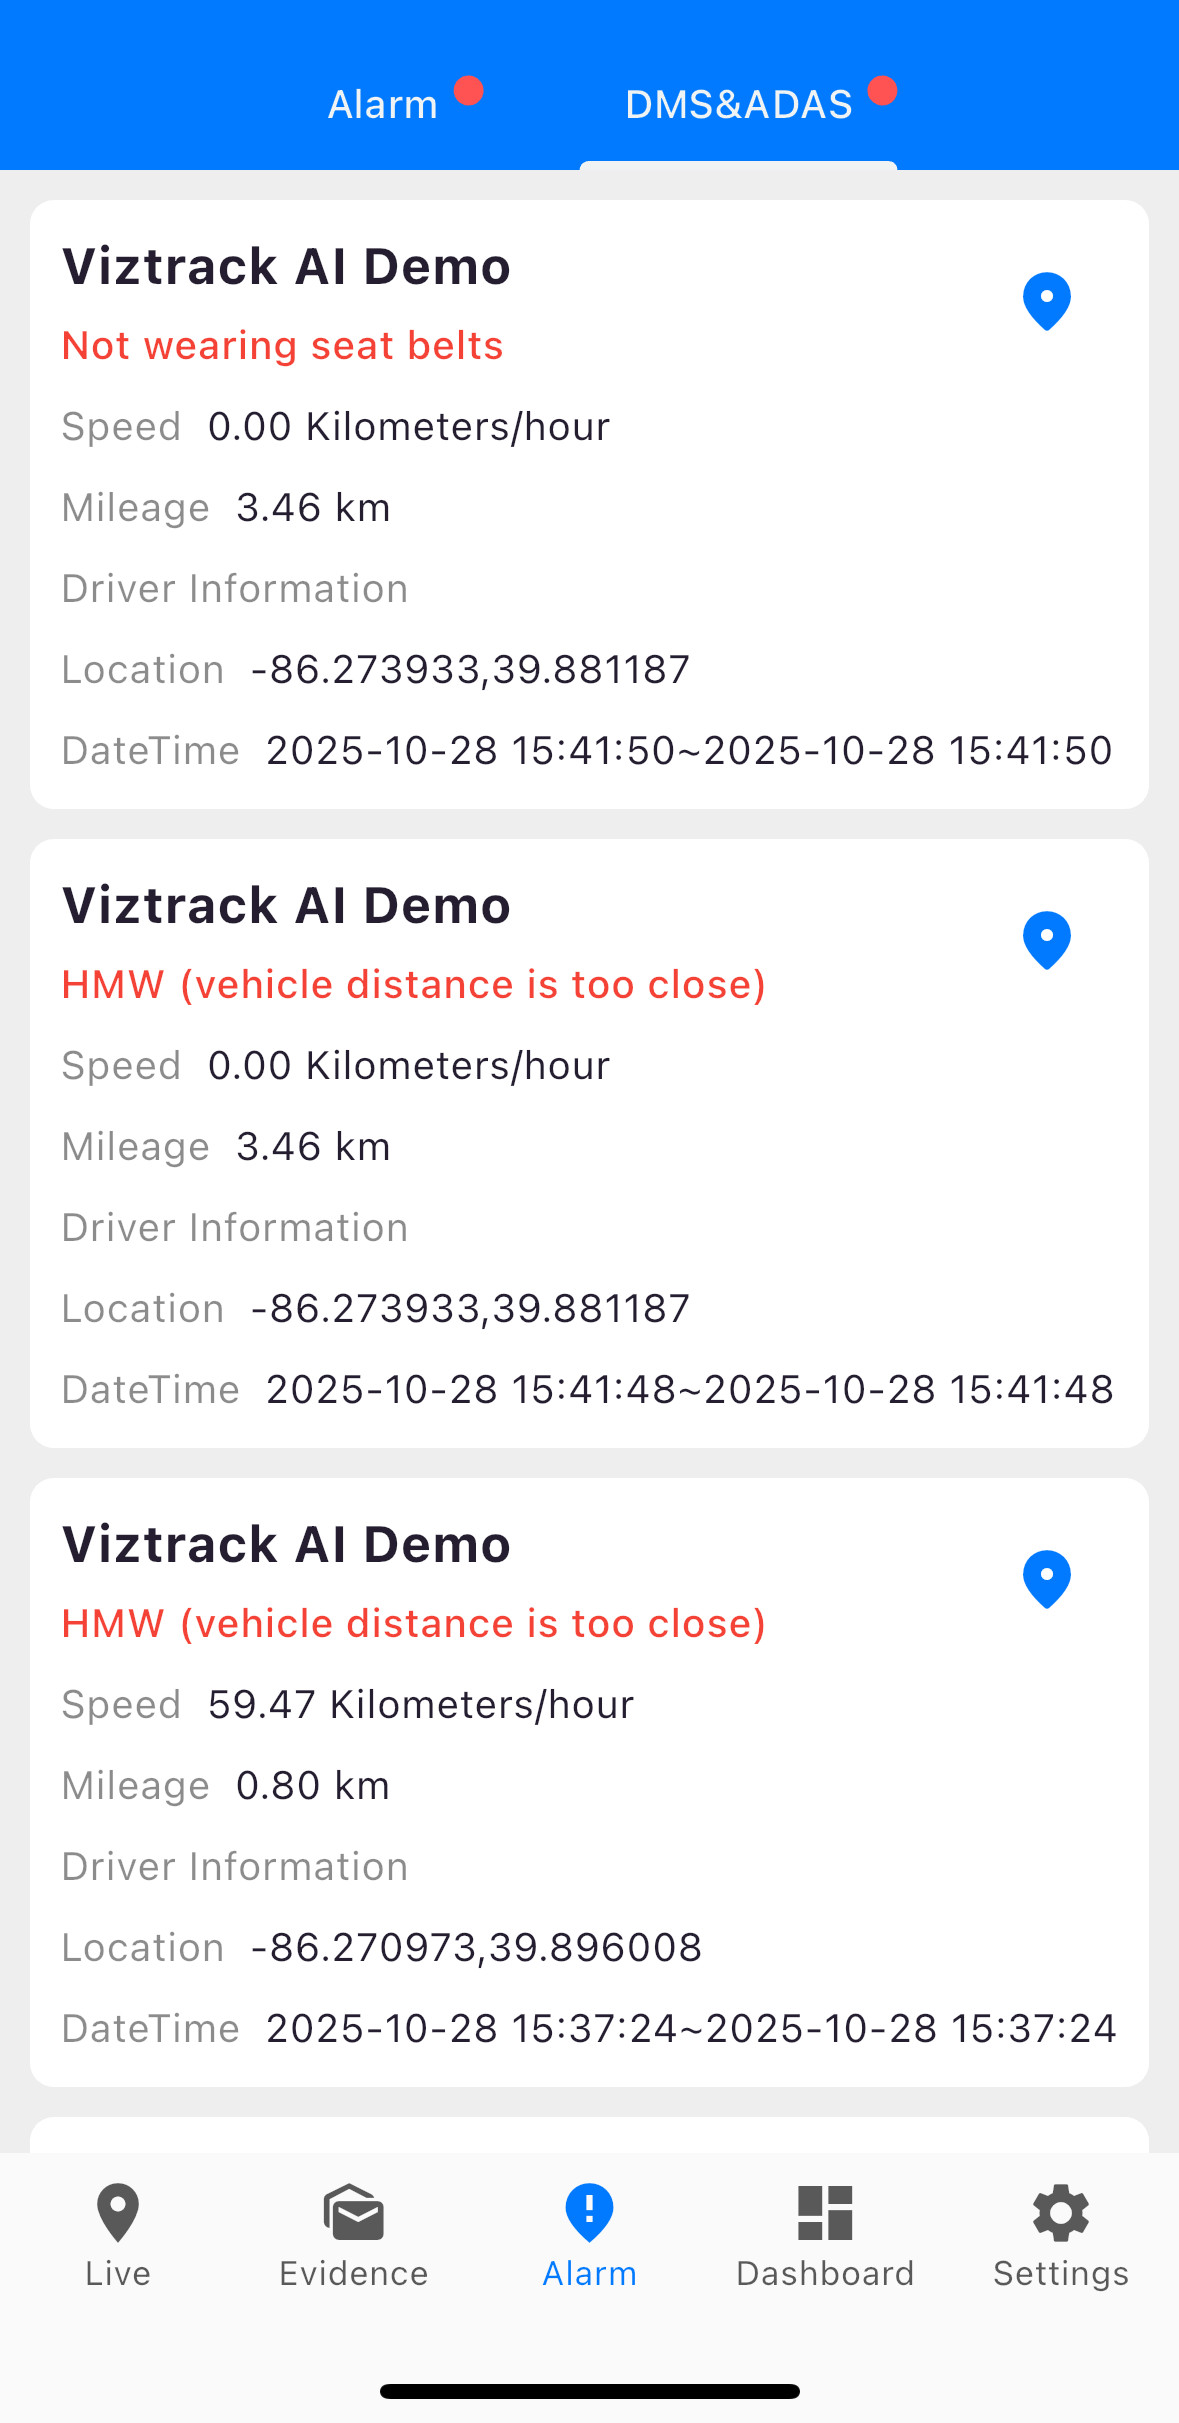
Tap the blue location pin to view the alarm’s exact position on the map, along with more details about the event.
This screen lists all triggered alarms, such as idle alarms, speed alerts, or other system notifications.
Each alarm card displays:
- Alarm Type – The category of the alert (e.g., Idle alarm).
- Speed – The vehicle’s speed when the alarm was triggered.
- Mileage – The total distance traveled by the vehicle.
- Driver Information – Details related to the current driver (if available).
- Location – The GPS coordinates where the alarm occurred.
- Date & Time – When the alarm was triggered.

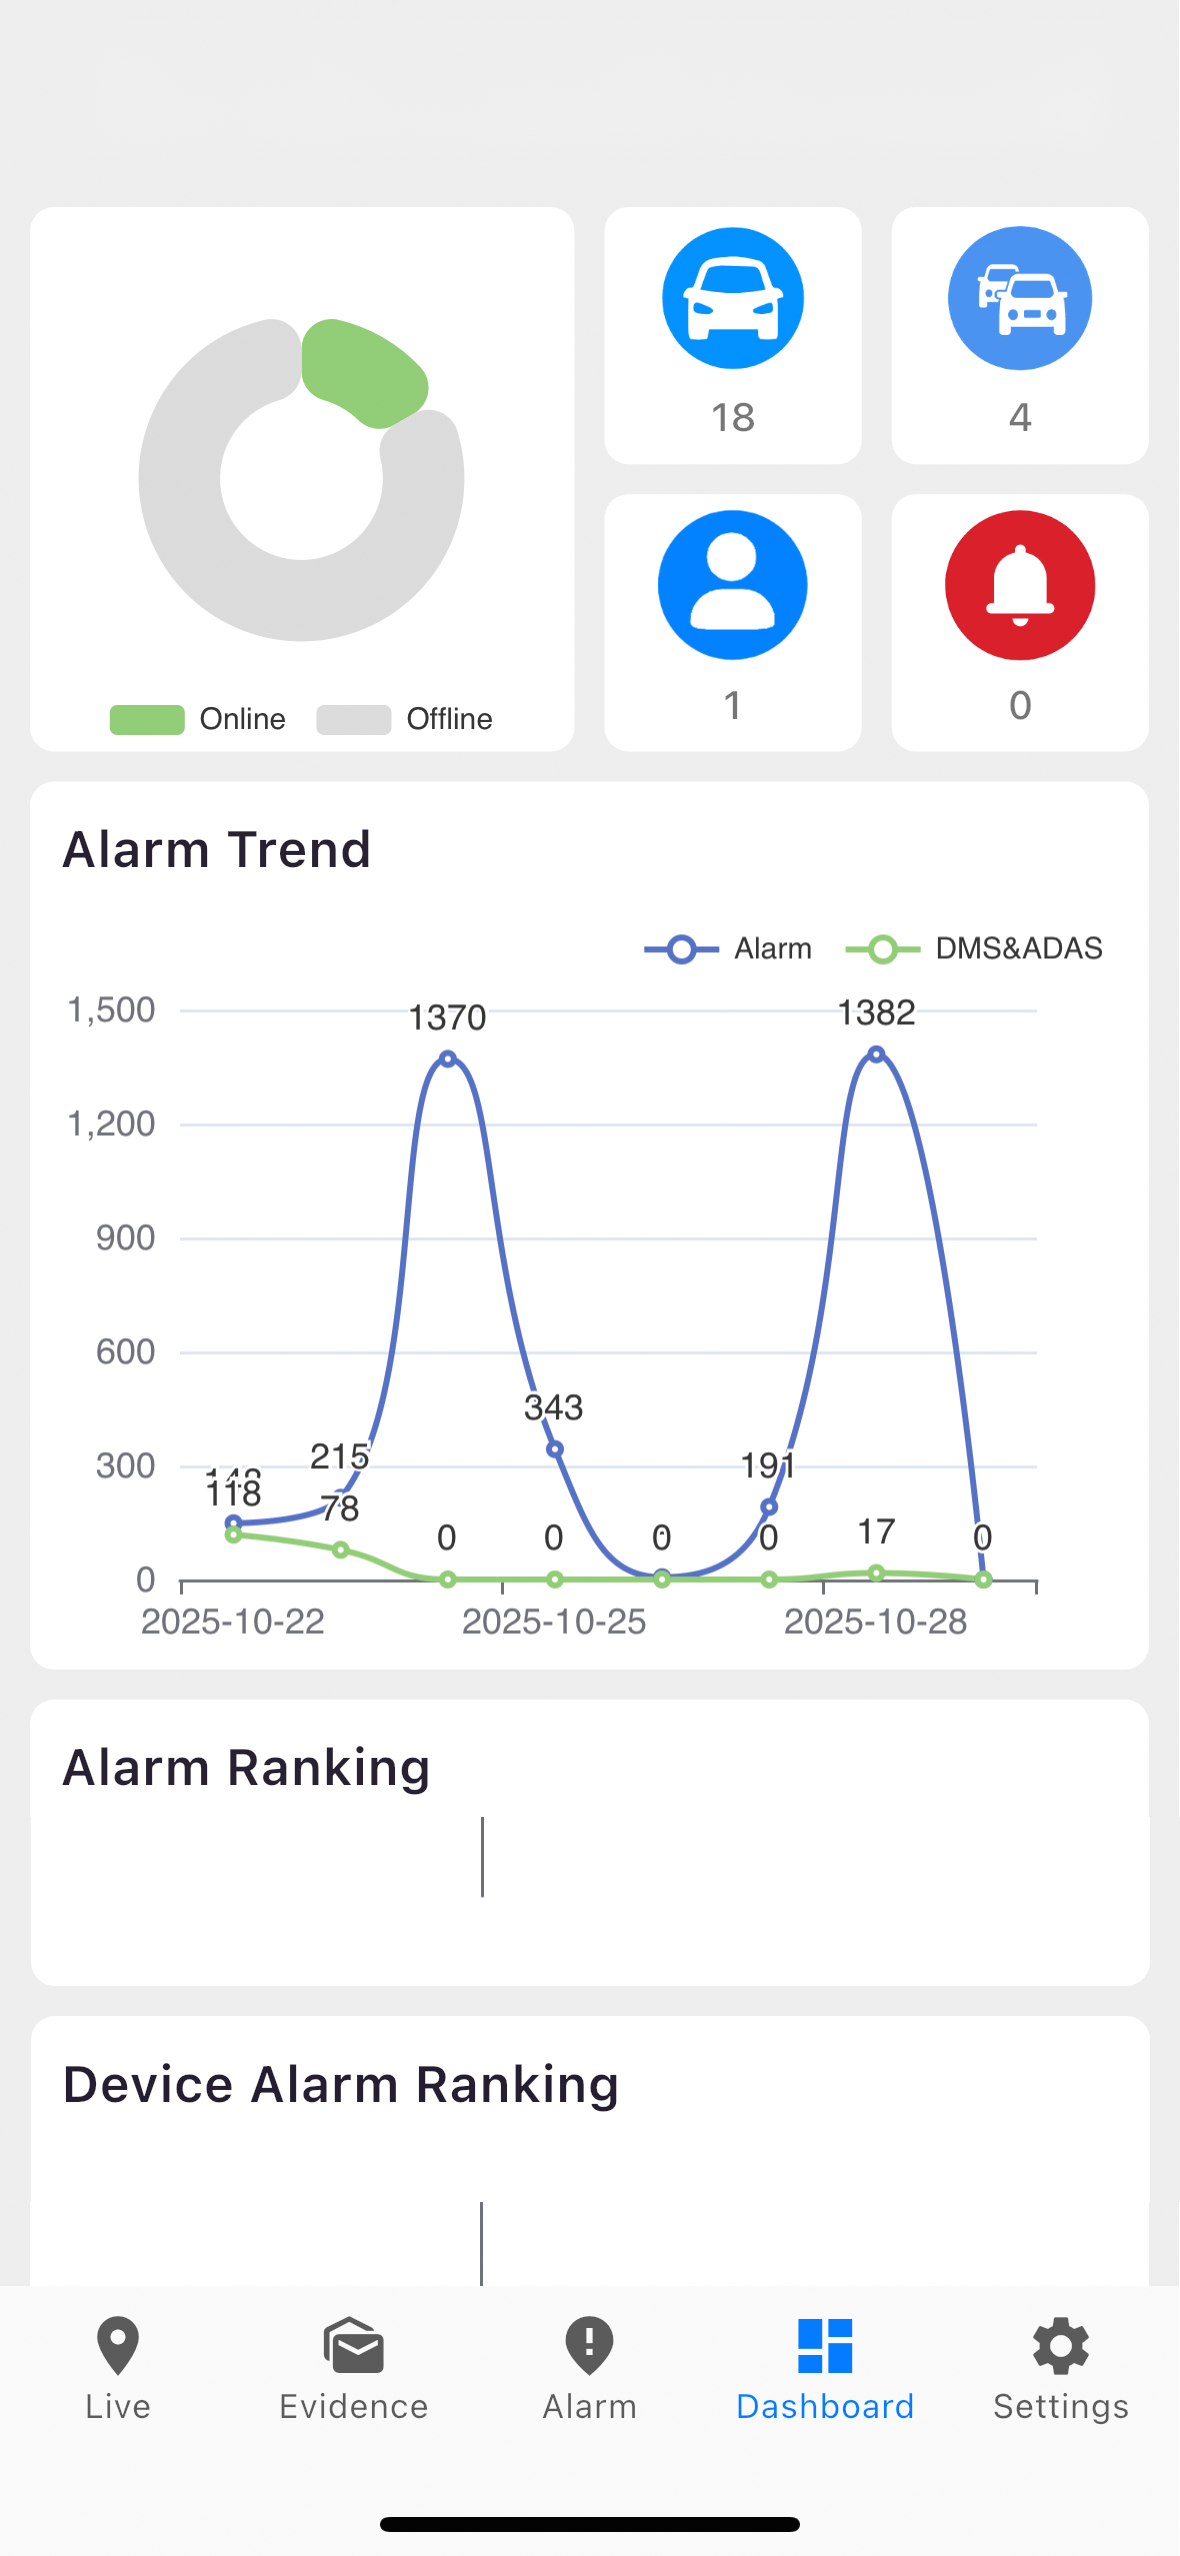
Use the Dashboard
The Dashboard provides an overview of your devices and their performance:
- Device Online Rate: See how many devices are active.
- Total Devices, Fleets, and Users: Get a quick count from your VSS server.
- Alarm Trend Graph: View the number of alarms triggered over time.
- Alarm Rankings: Check which alarm types occur most frequently.
- Device Alarm Ranking: See the top 10 devices with the highest alarm counts.
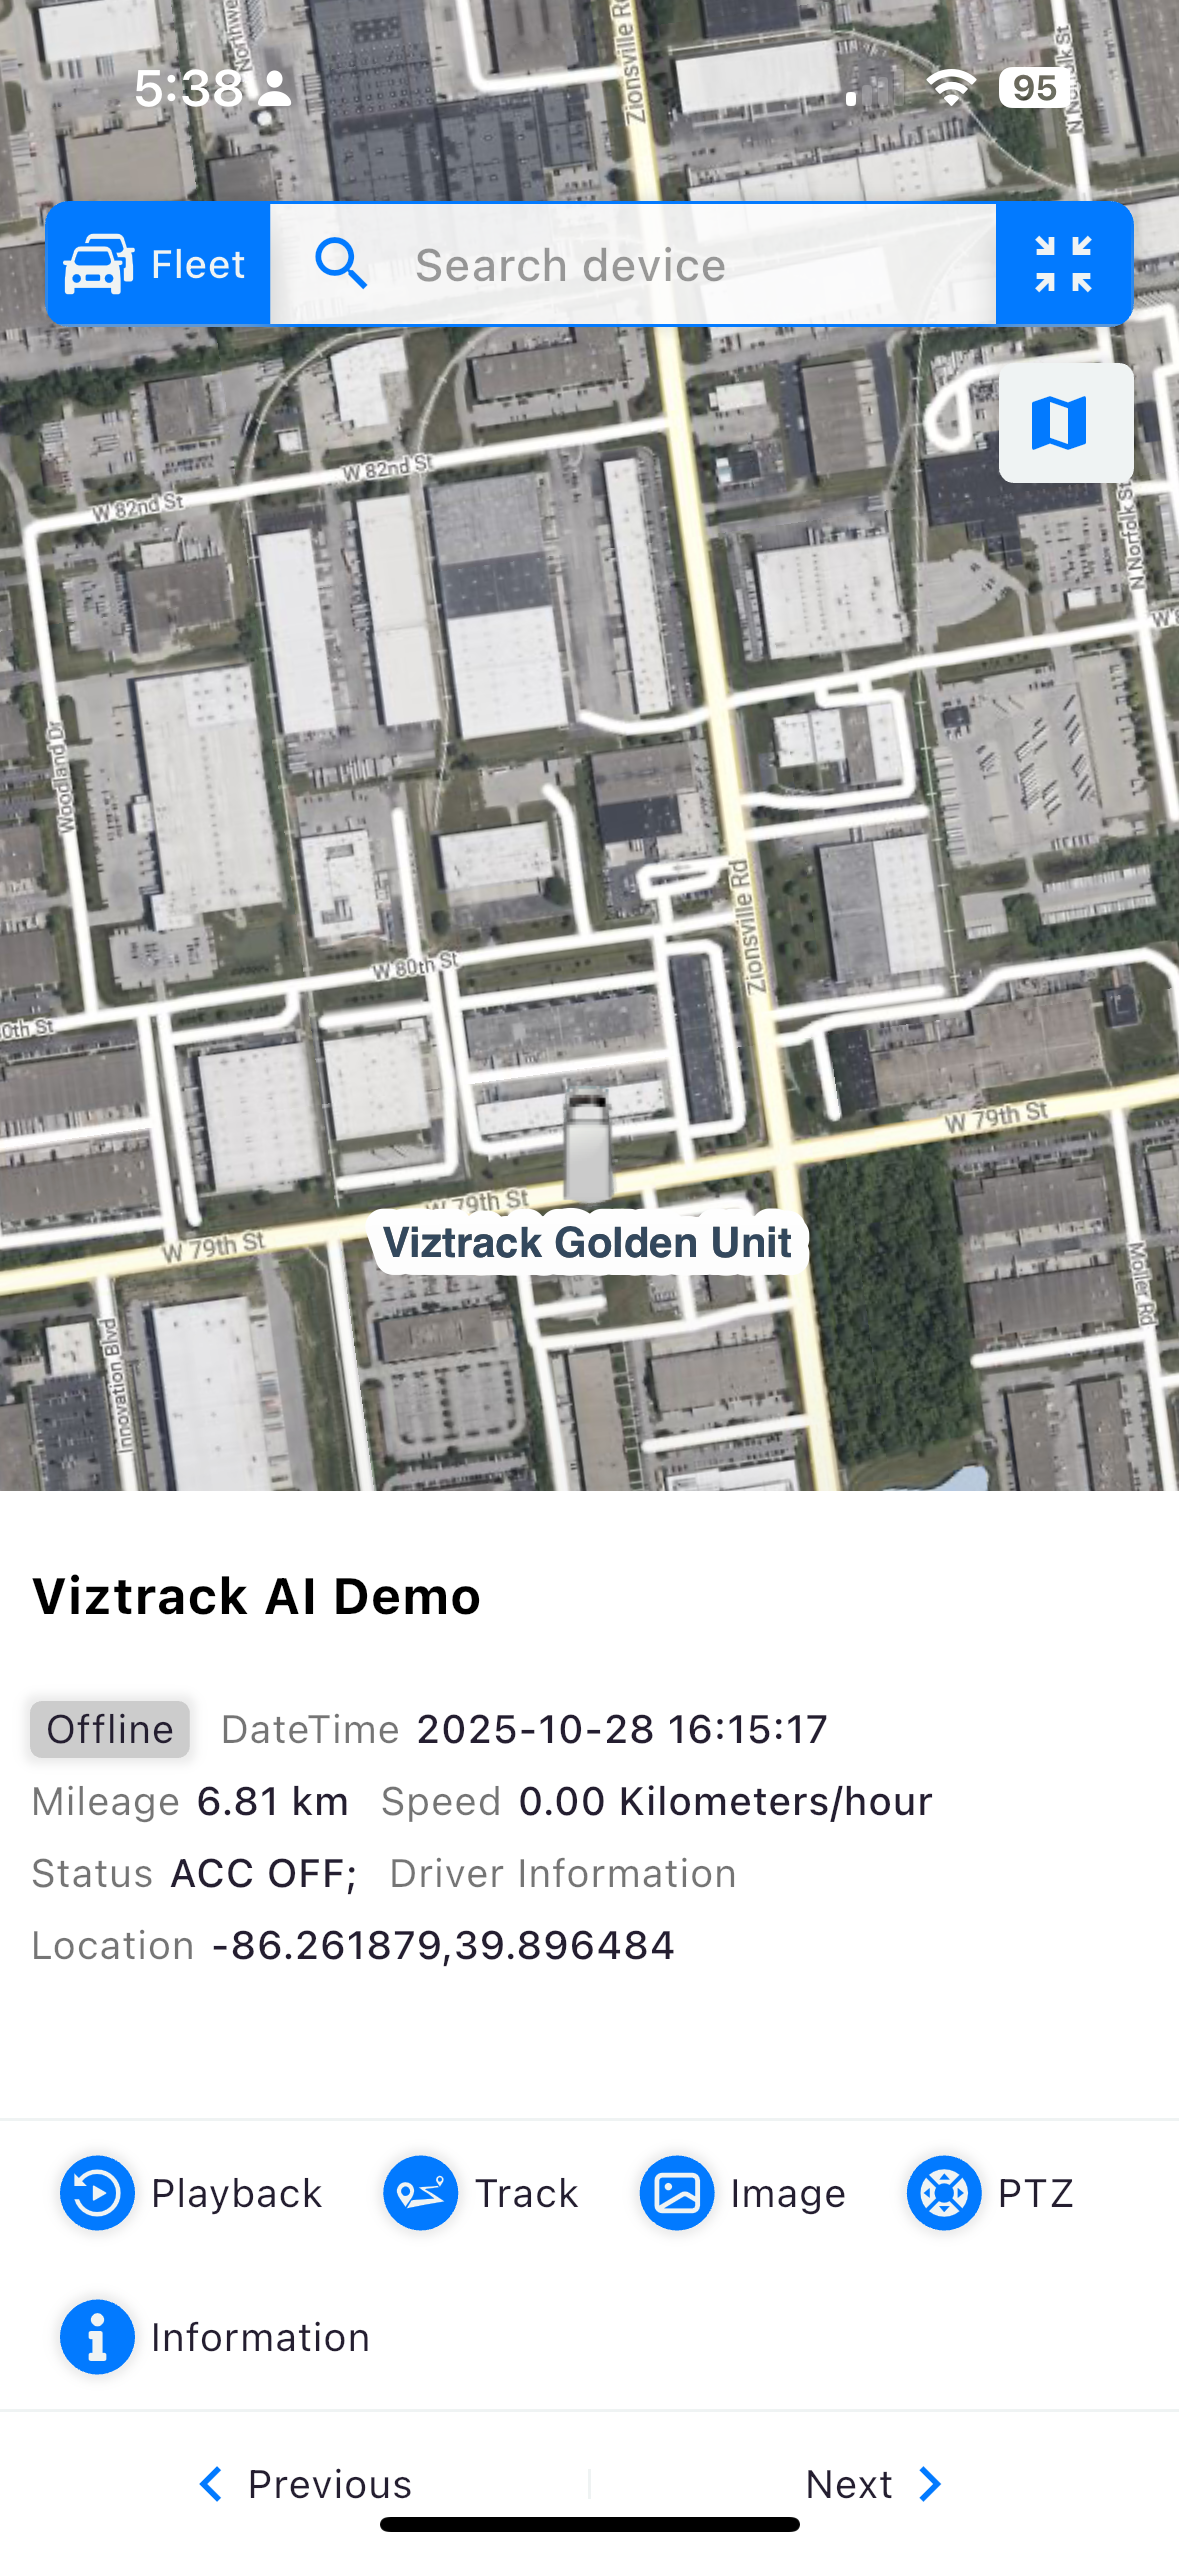
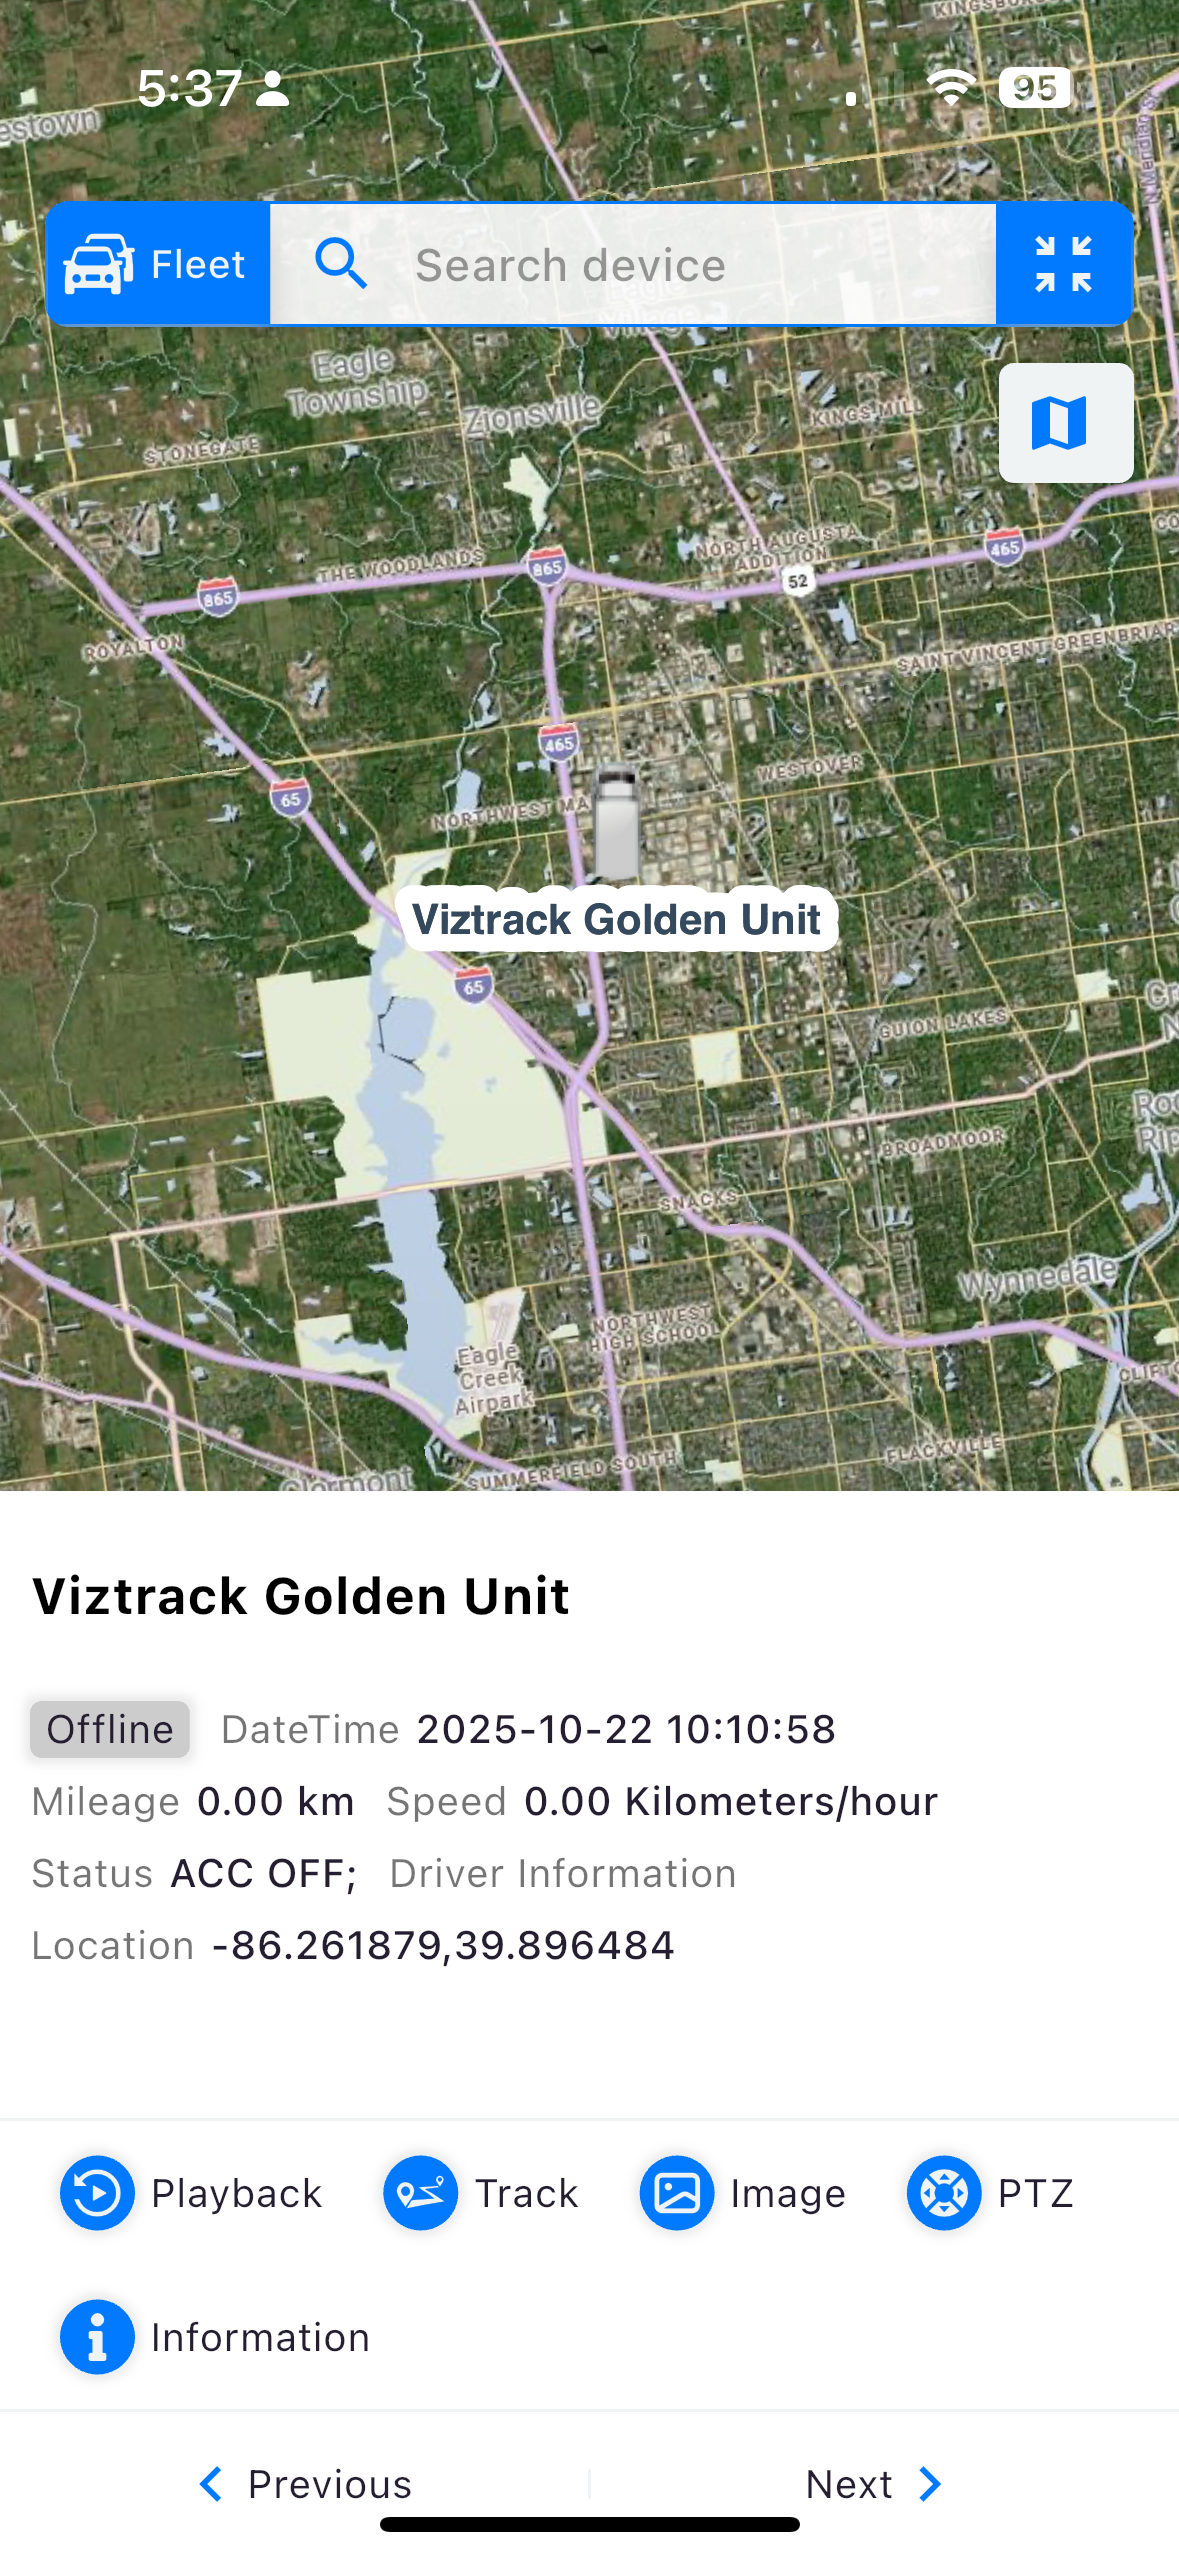
View and Control Vehicles on the Map
The Map screen lets you select and monitor your vehicles.
- Tap the fleet icon (top-left corner) to choose a fleet or vehicle.
- Green icons mean the vehicle is online; gray icons mean it’s offline.
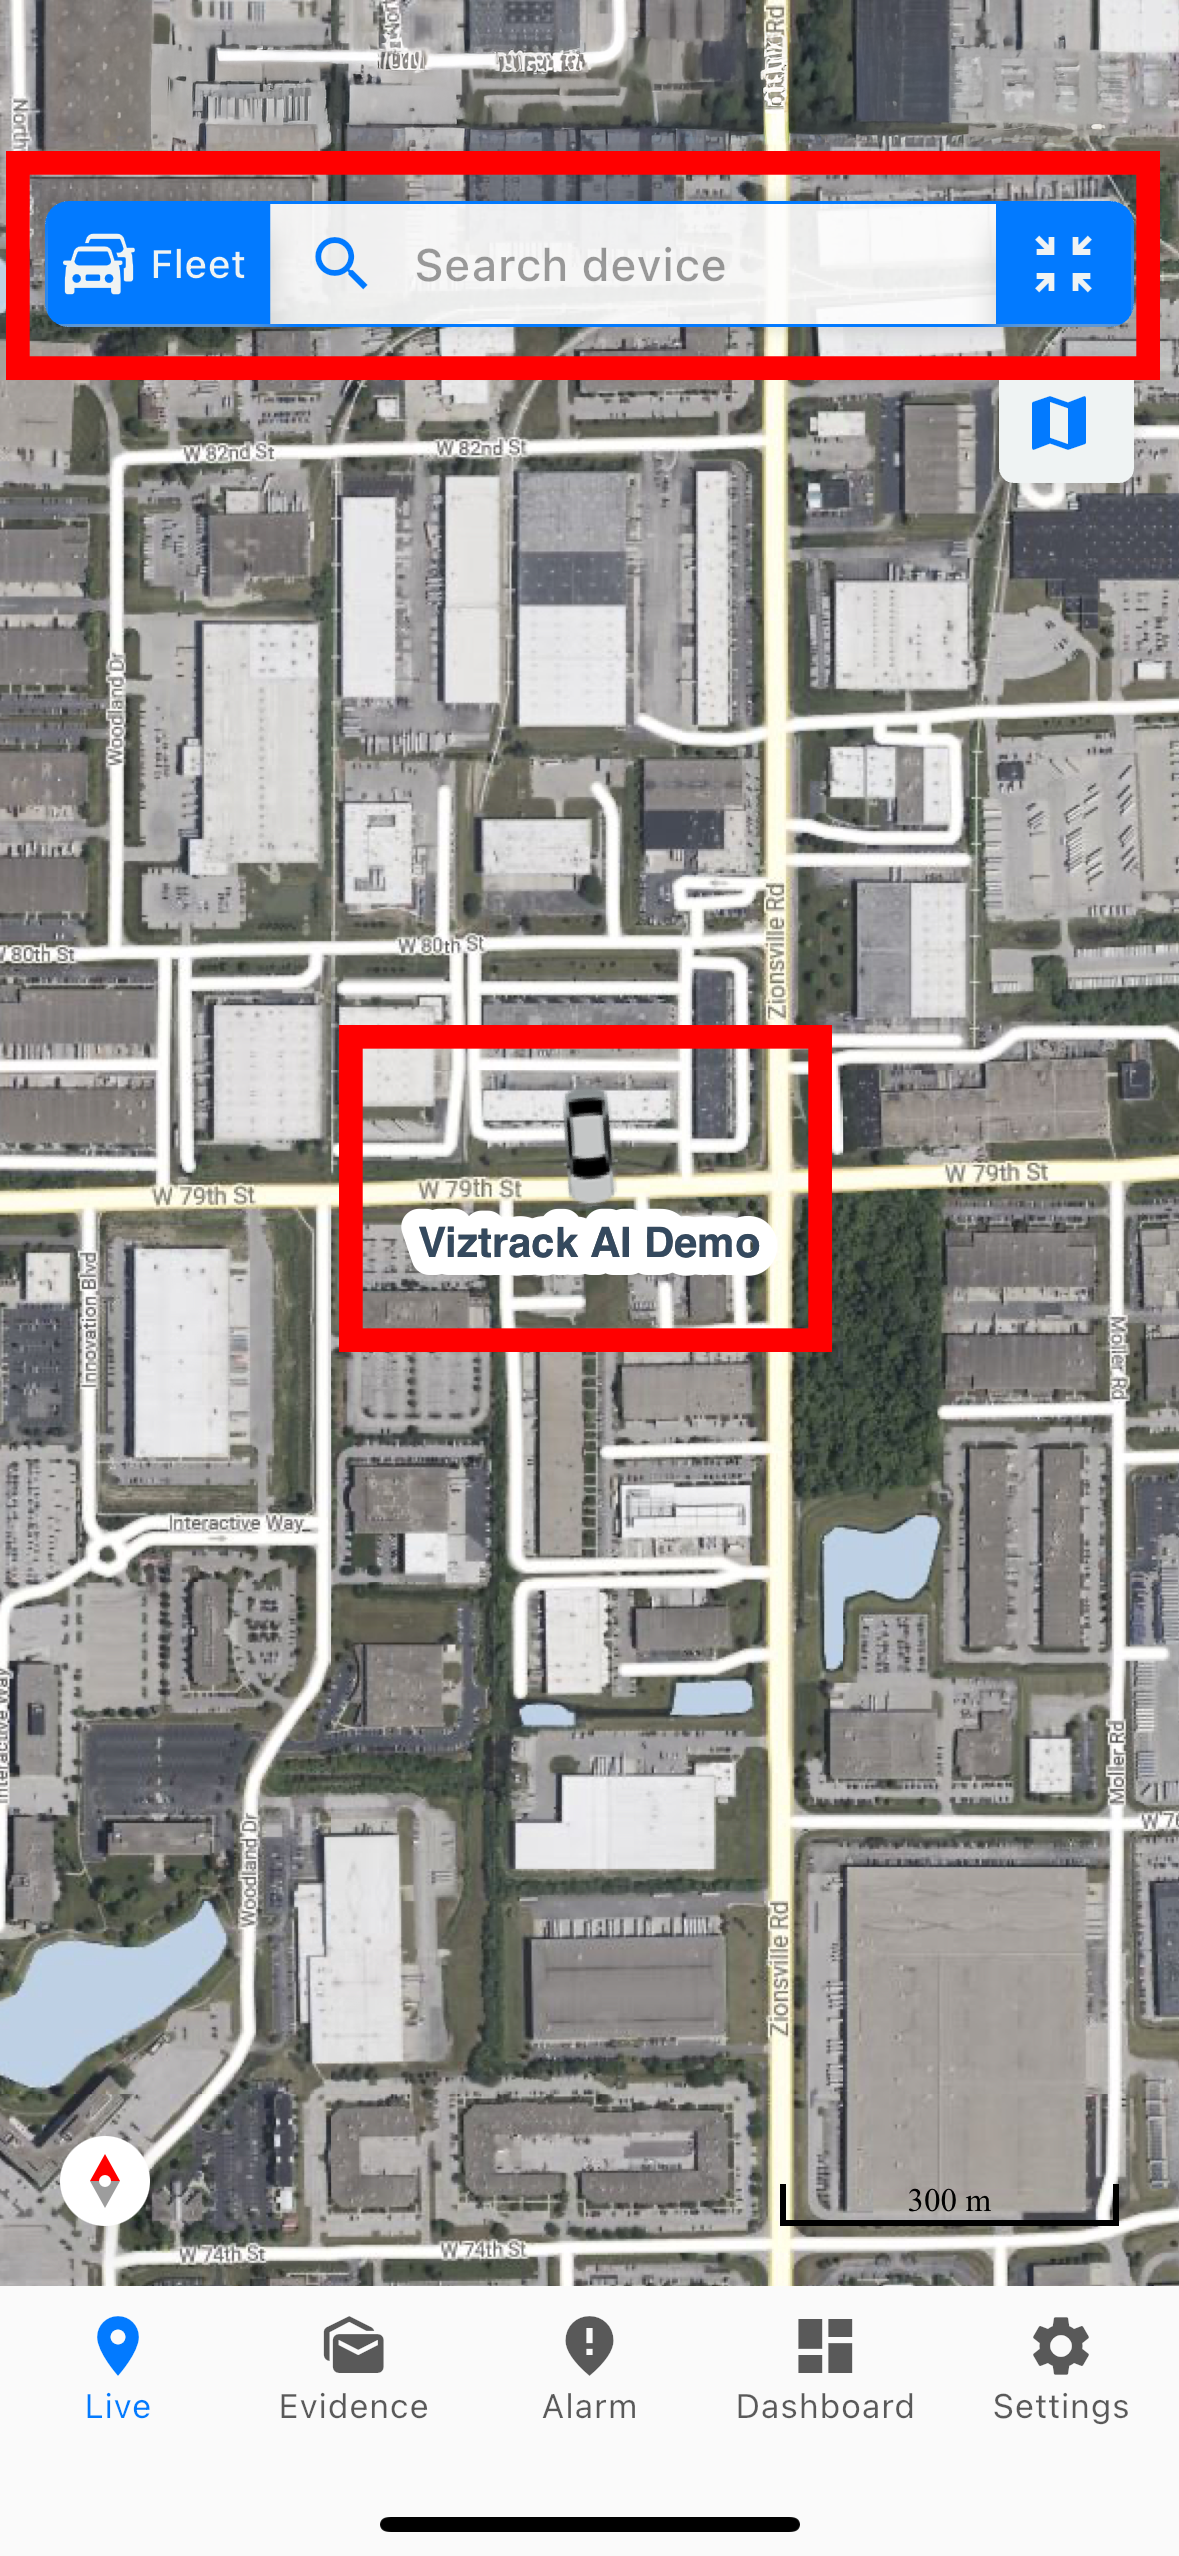
Vehicle Details:
- Selecting a vehicle reveals more information, such as speed, mileage, and ignition status.
- If you select multiple units, you can switch between vehicles by tapping the Previous and Next arrows.
Live View
To monitor a vehicle in real time, follow these steps:
- From the Live tab, select the desired vehicle from the list and tap the arrow (▾) beside the Company name or ID.
- Tap the 3 dots beside the Device ID.
- Choose Live from the pop-up menu.
- The app will open the Live View screen, showing:
- The vehicle’s current location on the map.
- Real-time camera feeds (such as front, rear, or in-cabin views).
- Key vehicle details like speed, mileage, ignition status, and location coordinates.
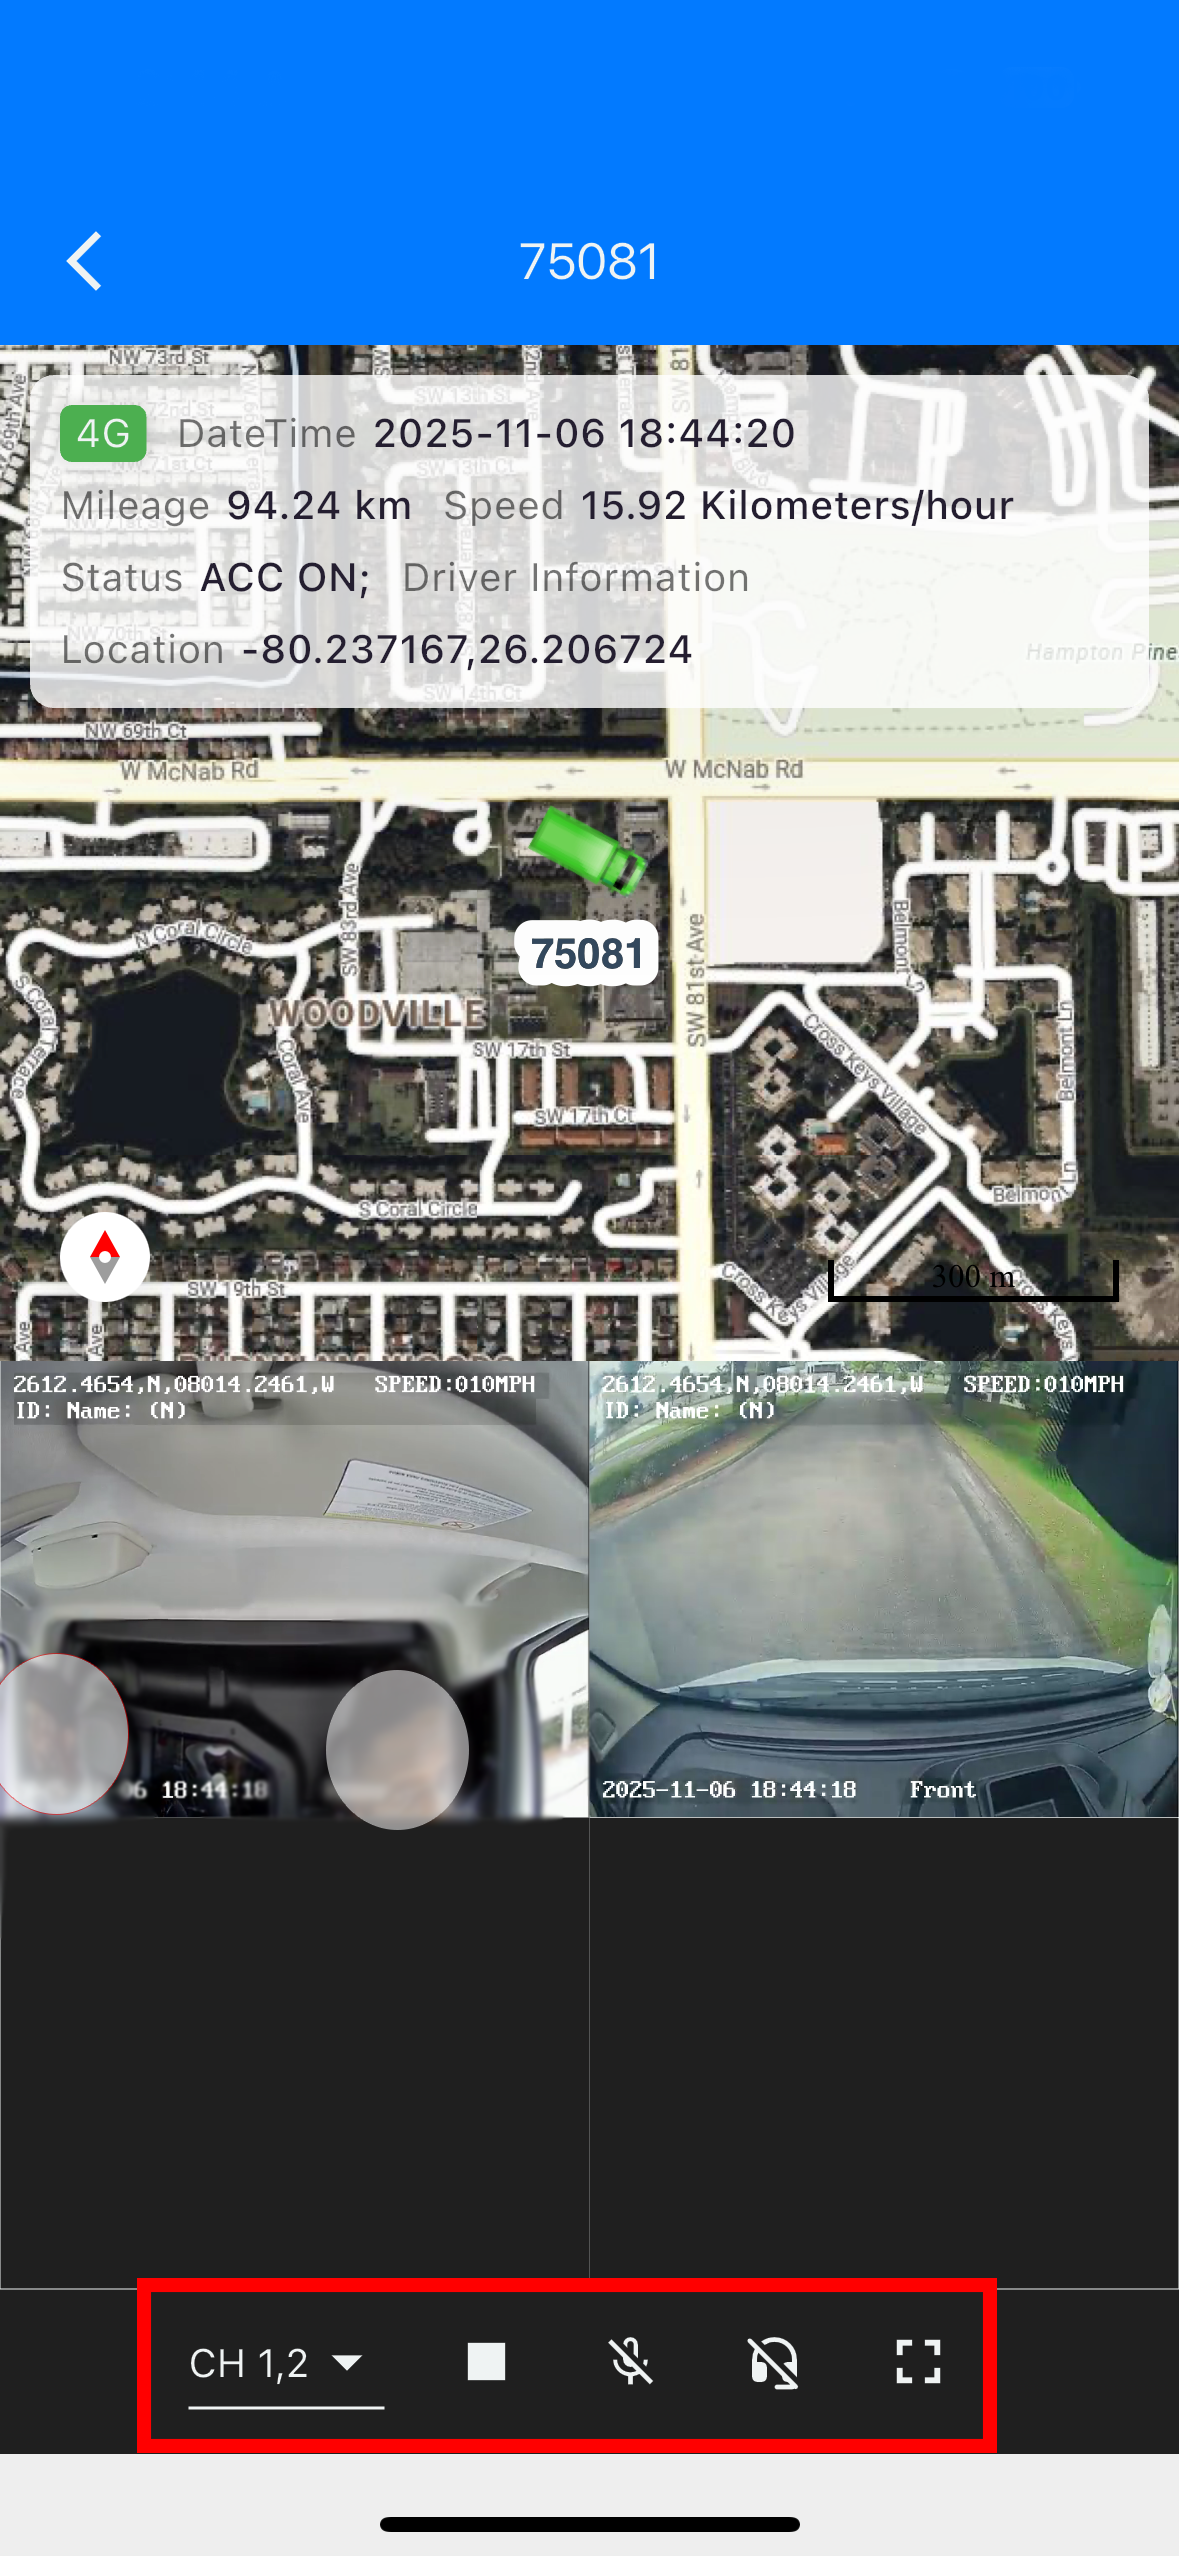
Use the control icons at the bottom of the screen to switch camera channels, start or stop video, enable audio or intercom, and view in full screen.
Live View Controls
CH (Channel Selector)
Choose which camera channels to display (for example, front, rear, or in-cabin cameras).
Stop / Play
Start or stop the live video stream from the selected channels.
Mute / Unmute
Turn the camera's audio feed on or off.
Intercom
Enables two-way communication with the driver using the built-in microphone and speaker.
Full Screen
Expands the video view to full screen for better visibility of the live feed.
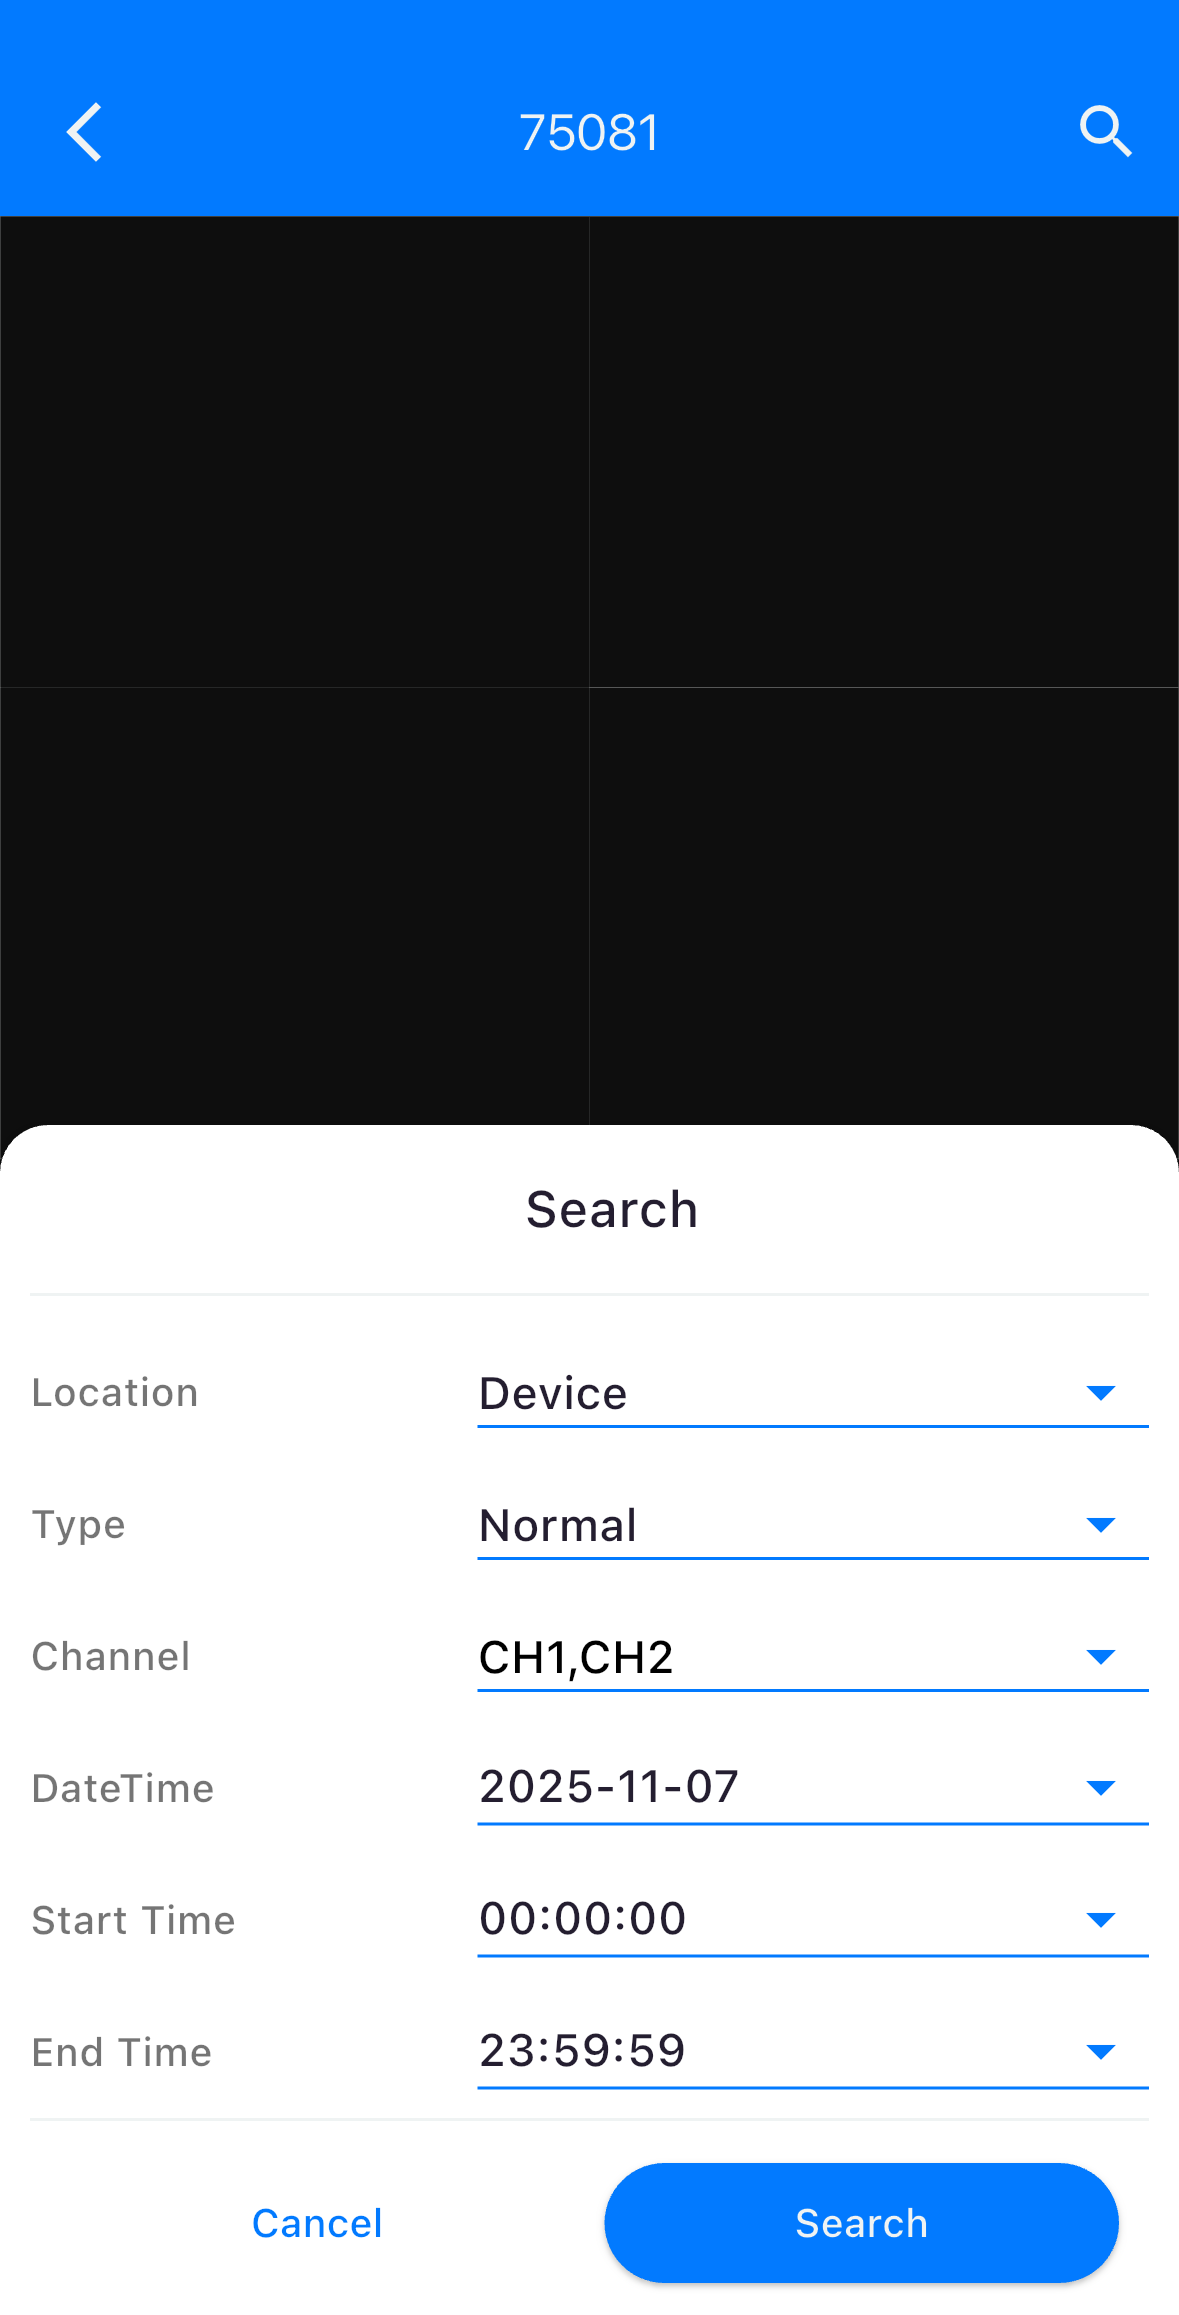
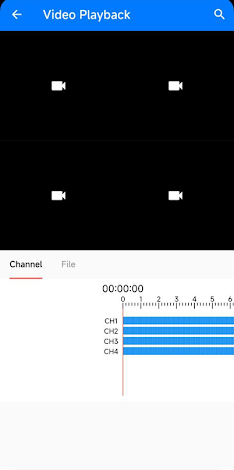
Video Playback
The Playback feature lets you watch previously recorded videos from your vehicle’s cameras. You can review events, trips, or alarms that happened at any time.
Steps to Access Playback
- From the Live tab, select a vehicle.
- Tap the arrow (▾) next to the vehicle name or ID.
- Choose Playback from the menu.
- The Search screen will appear.
Search Options
- Location – Choose where to search videos from (Device, Alarm Server, or Download Server).
- Type – Select the video type (Normal for regular footage, Alarm for event-triggered footage).
- Channel – Pick one or multiple camera channels (e.g., CH1, CH2).
- DateTime – Select the date of the recording.
- Start Time / End Time – Set the specific time range you want to review.
- Once all fields are set, tap Search to load available recordings.
Playback Screen
- You can play, pause, or scrub through the video timeline.
- Use the channel selector to switch between camera views.
- Tap the full-screen icon for a larger display.
Playback Options
- Drag along the timeline to reach specific timestamps for playback.
- In File mode, click the play button to watch the video.
PTZ Control
Functionality: Control the PTZ (Pan-Tilt-Zoom) camera.
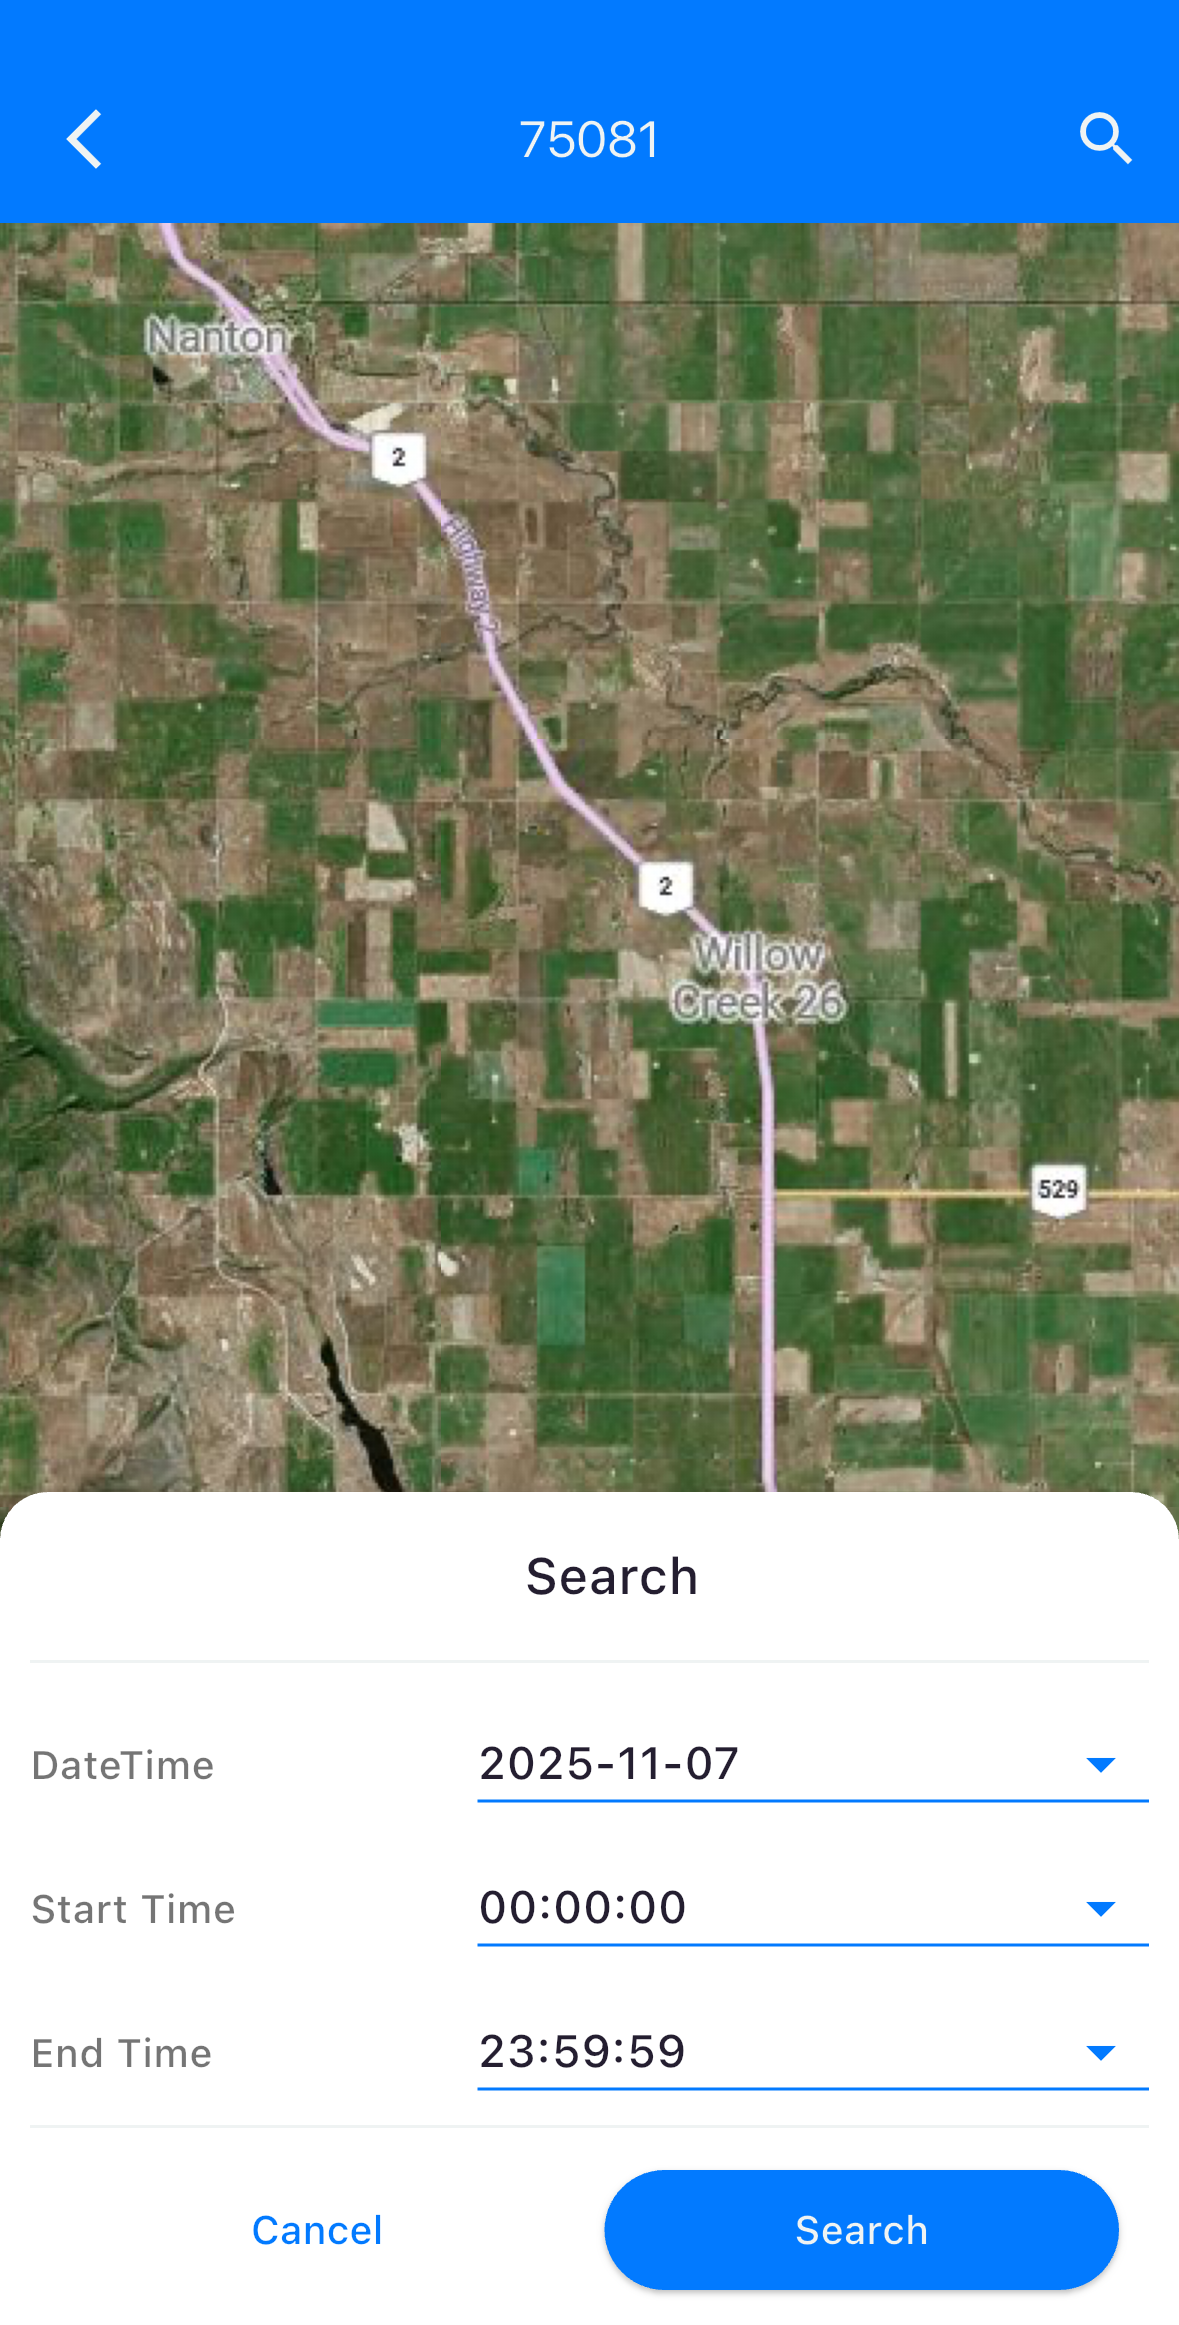
Track Vehicle History
This feature is designed to allow users to investigate and review the historical movement of a tracked vehicle or asset.
Set Start and End Times to Search for the Vehicle’s Historical Route: Users can specify a precise date, start time, and end time to narrow down the data and display the corresponding route taken by the vehicle on the map during that period (as shown in the search overlay).
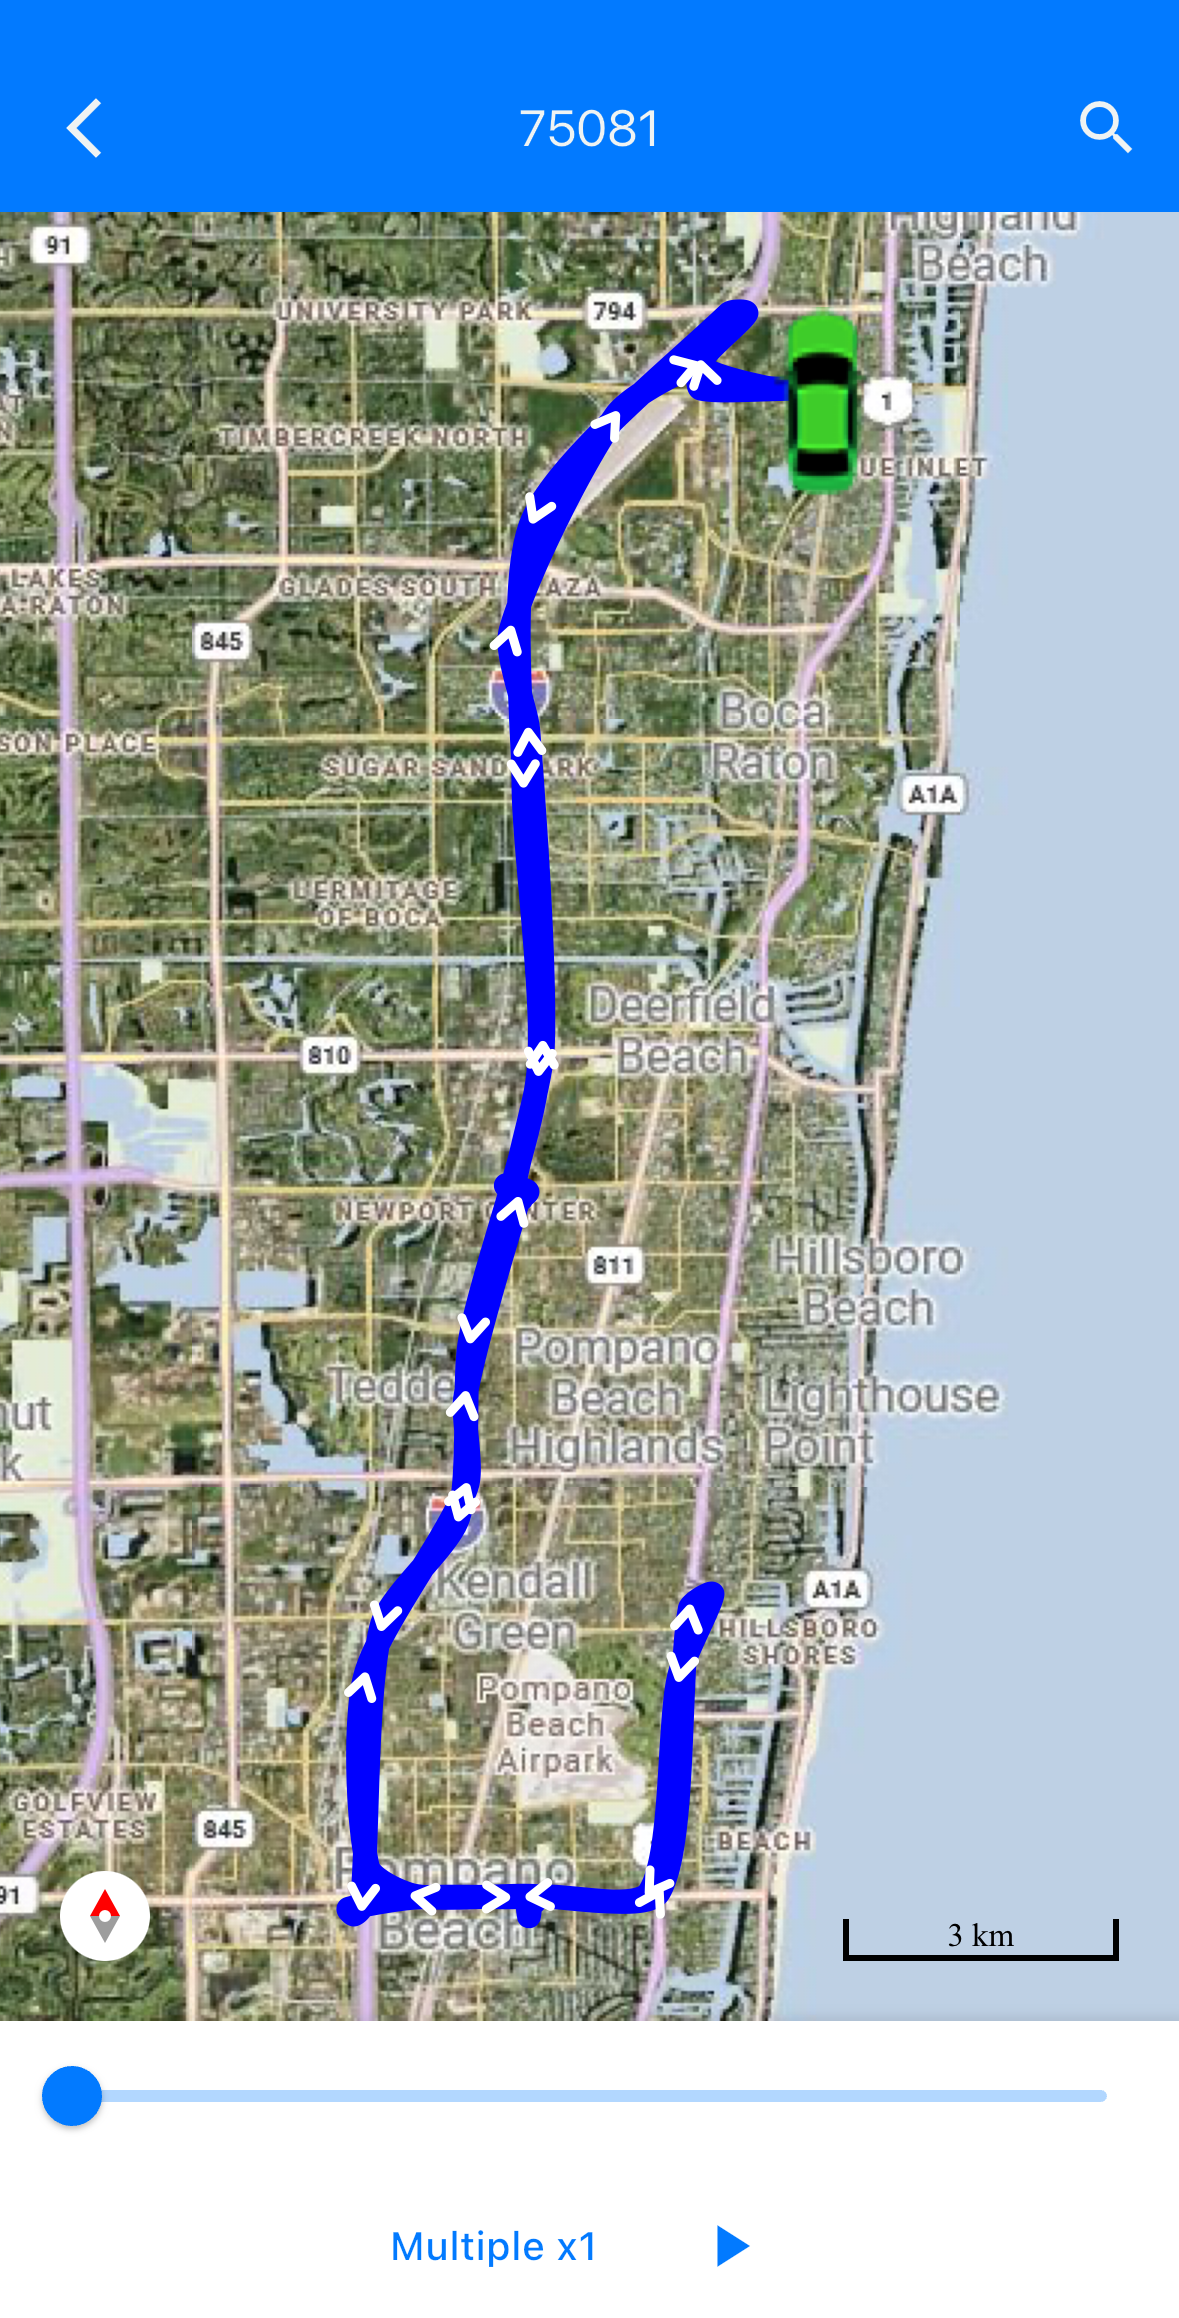
Playback Speed: The playback controls (visible with the "Multiple x1" indicator) allow the user to adjust the rate at which the vehicle icon moves along the displayed historical track.
Start/Stop Playback: The interface includes controls to initiate and pause the visualization of the historical route movement.
Image Search
This feature allows users to efficiently search for and retrieve specific images captured by the device, based on several key criteria.

Location: Choose the storage source for the images from the following options:
- Device (Local storage)
- Alarm Server
- Auto Download Server
- Video Server
Type: Filter images by category: Normal or Alarm.
DateTime: Select the specific day required for the search.
Start Time: Set the precise start time for the search window.
End Time: Set the precise end time for the search window.
Search: Click this button to retrieve images that match all the selected criteria from the specified location.
Settings
This screen provides the user with control over the application's configuration, display formats, and access to system-level information.
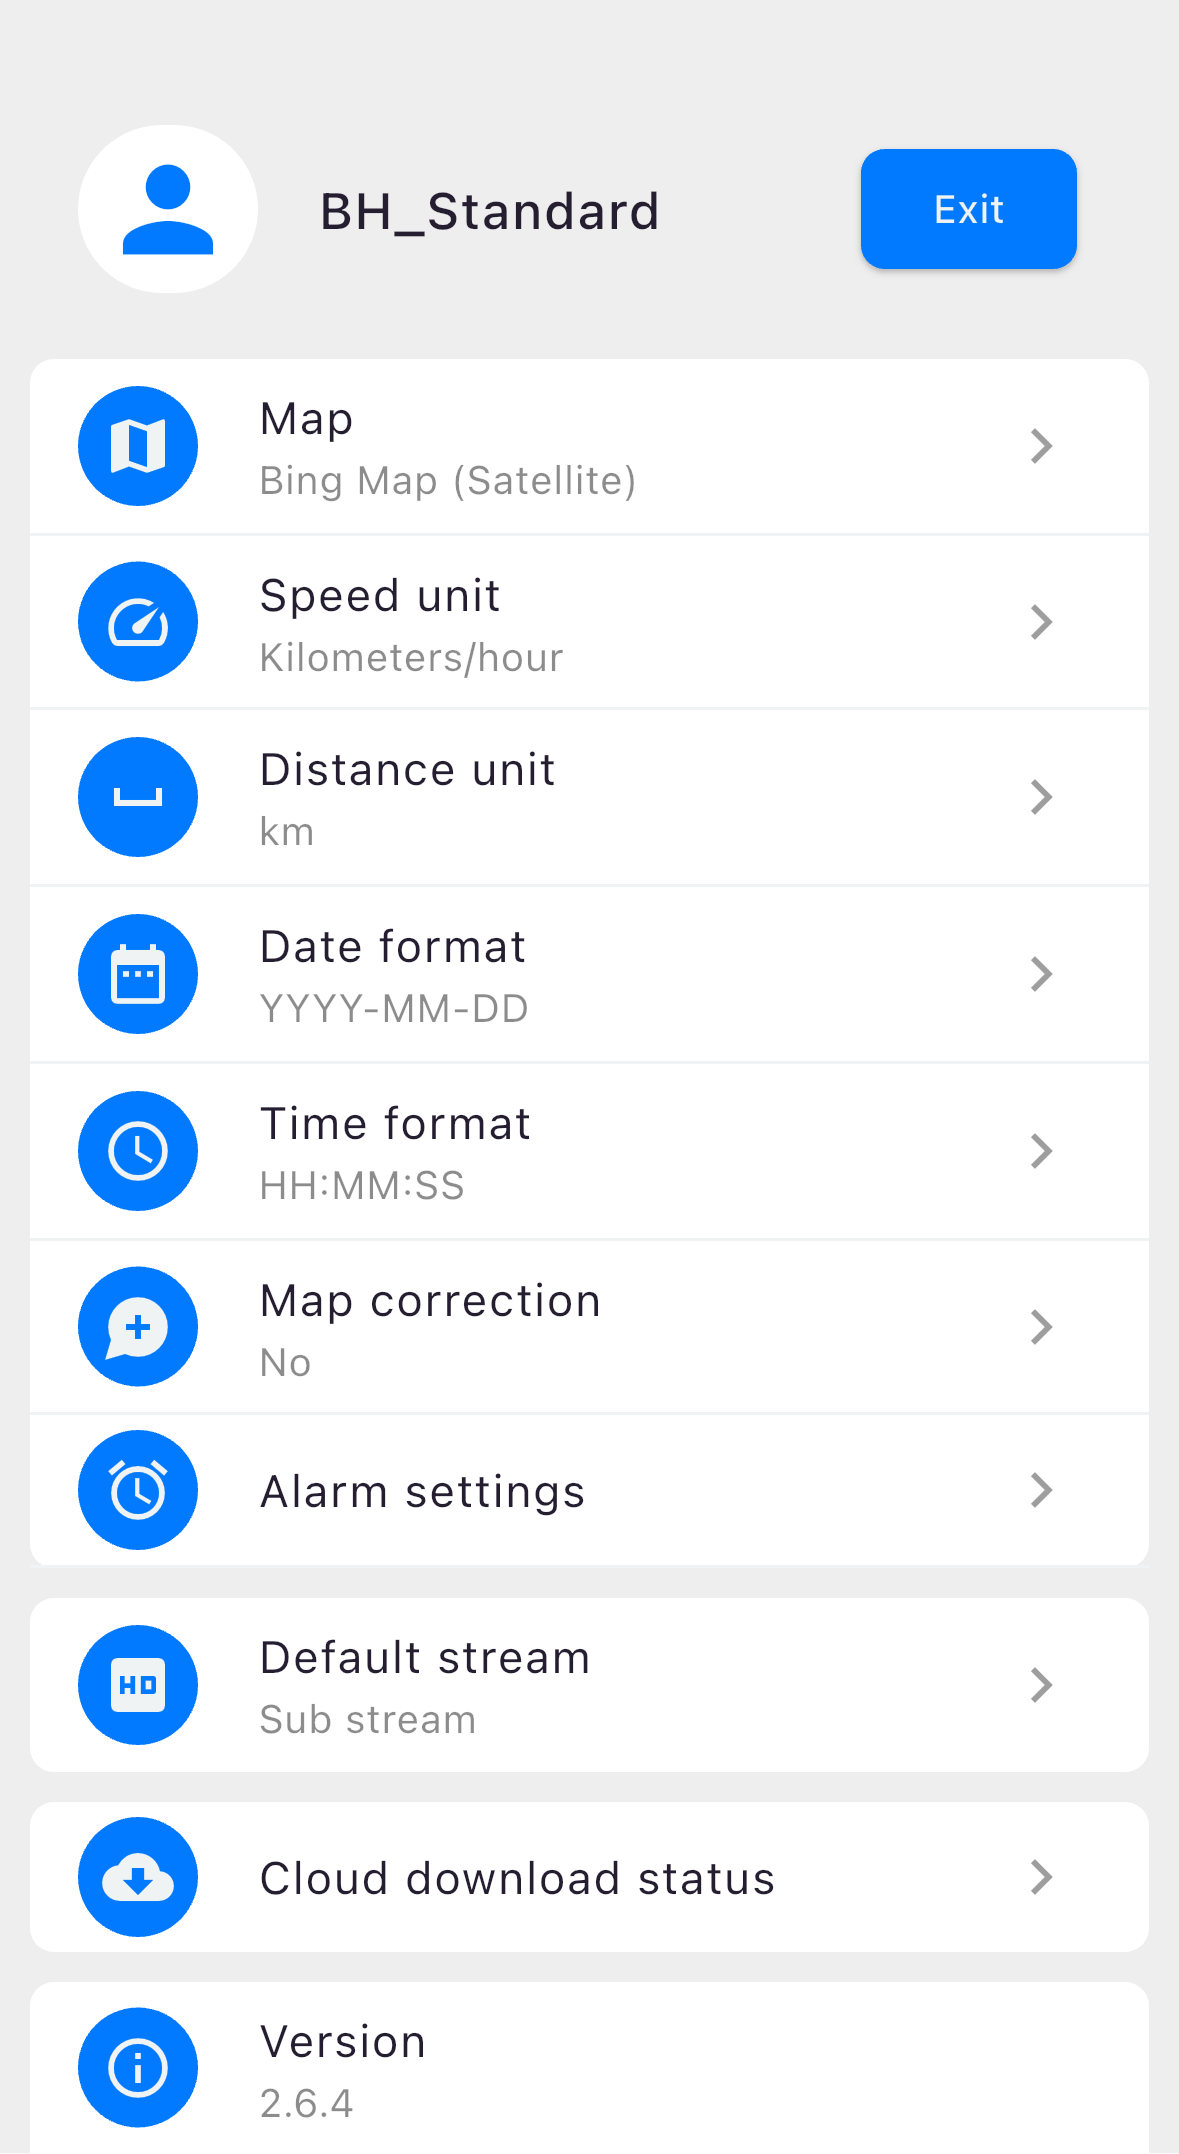
User Identification: Displays the current user profile, BH_Standard, with an Exit button to log out.
Map: Selects the map provider and view type.
Speed unit: Sets the unit for speed display.
Distance unit: Sets the unit for distance display.
Date format: Configures the displayed date format.
Time format: Configures the displayed time format.
Map correction: Toggles or adjusts map correction settings.
Alarm settings: Directs the user to a separate menu to configure alarm triggers and notifications.
Default stream: Sets the default video quality stream for live viewing.
Cloud download status: Checks the status of data downloads to the cloud.
Version: Displays the application's current software version (2.6.4).
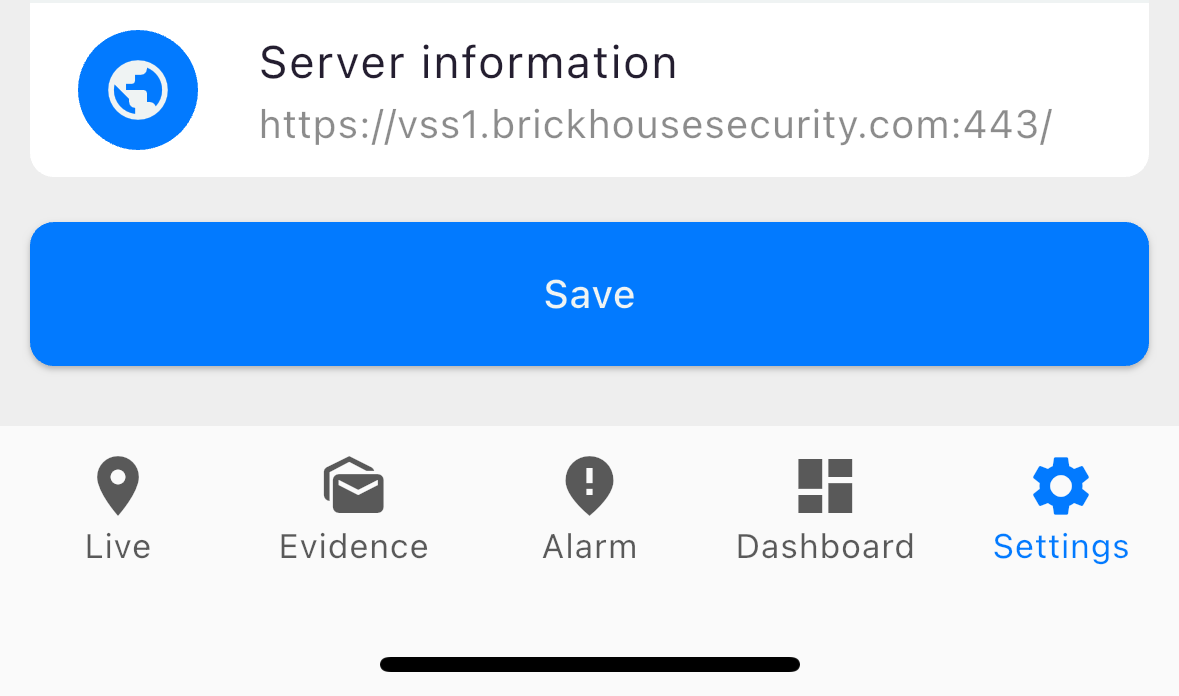
Server information: Shows the address of the connected server (https://vss1.brickhousesecurity.com:443/).
Save: A prominent button at the bottom to apply and save any changes made to the settings.
For further assistance, please refer to the app's help section or contact customer support.
Oct 28th 2024